JQ
Log for the month of November, 2009
November 1, 2009
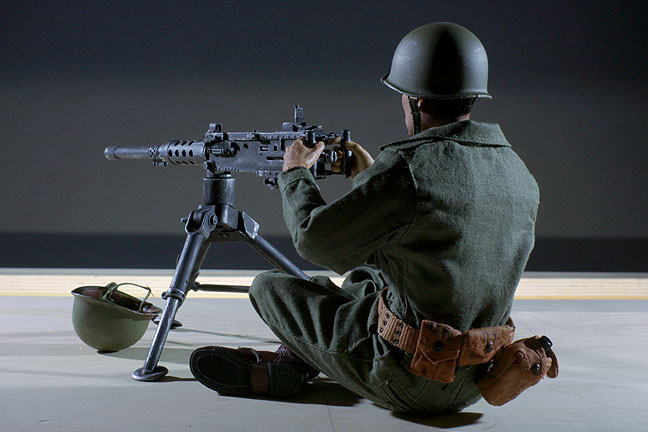
Nothing
spectacular. Just a quick night time lighting test on the new stage. I
found some nifty compact flourescent (did I spell that right?) lamps with
the smaller base that match my el-cheapo movie lights. They say they
are tungsten balanced at 3200 degrees but are actually a tad on the blue
side IMHO, which works fine for night time shots! For any daylight shots,
I'll need to add some full CT color correction gel but, otherwise, I think
they work just great. No heat, either! :)
November 3, 2009
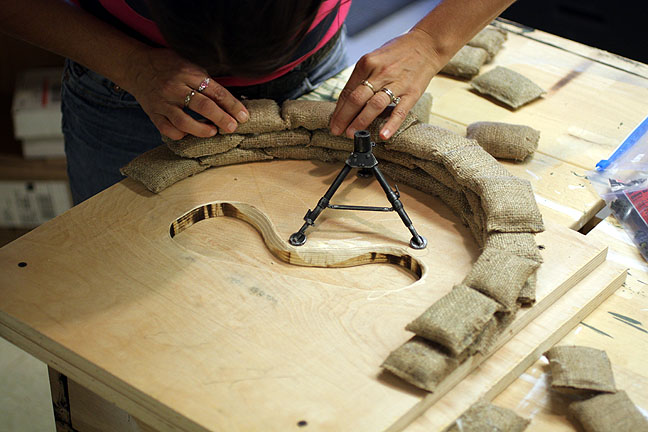
After
the obligatory painting of the stage in flat black, we went to work on
the machine gun nest set. Here you see Brandi hot melt gluing the sandbags
into place. I found that I had to remove the feet of the soldiers to get
them into a position that more closely matched the cartoon version. Fortunately,
you don't really see their feet in the shot so it didn't matter. I also
made a depression for their legs to go into which helped raise the machine
gun to more eye level, in keeping with the cartoon drawing.
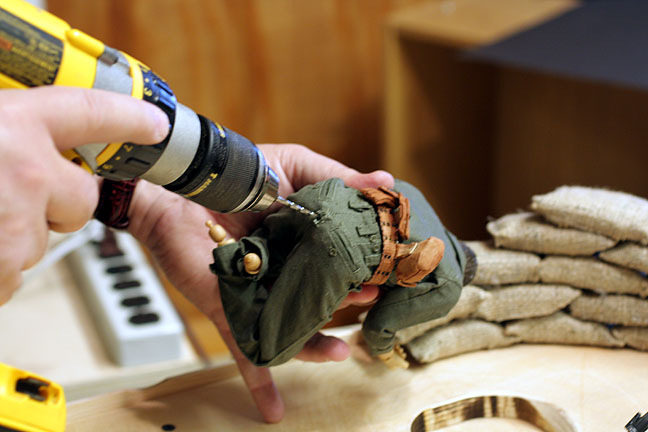
Don't
ask, don't tell, okay?
Look,
I needed a way to attach the soldiers firmly to the set and this seemed
like the most practical way to achieve that goal.
I don't
want to hear about it in emails. So just move on. There's nothing to see
here.
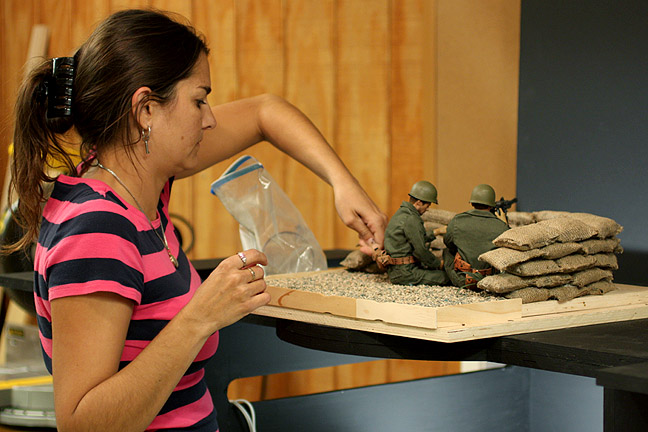
Here
Brandi is adding kitty litter to the set to simulate a rocky terrain. This
will be augmented with larger, real rocks as well.
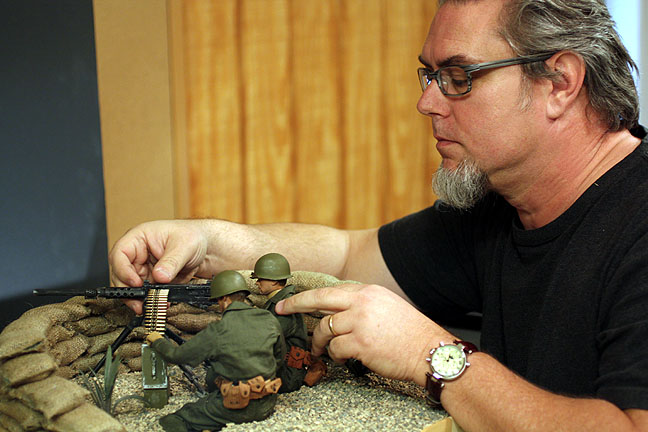
Yours
truly making some final adjustments to the machine gun and soldiers.
The
larger rocks have not yet been added.
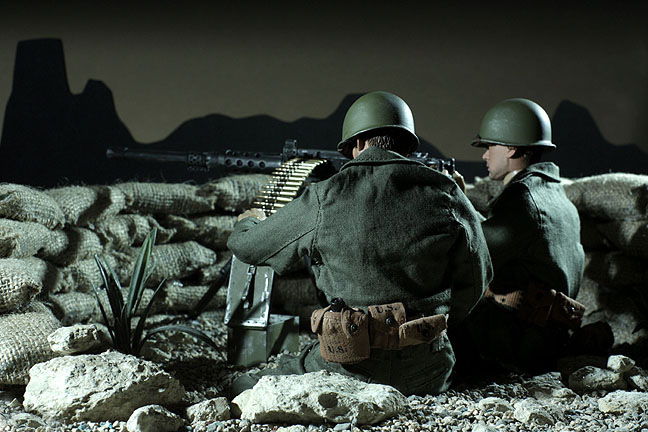
Two different views of the set during a lighting test. This one was shot with a 50mm lens. I like it but feel it is a bit too compressed and depth of field is problematic as the lens only stops down to f16.
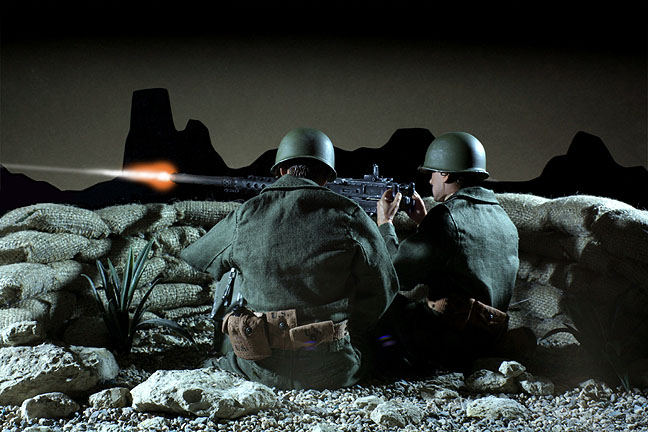
This
was shot with my favored 35mm lens, which gives a nice bit of depth and
stops down to f22. Still, I kind of like the softer mountains in the background
of the 50mm. Hmmm.....I'll have to think about it a bit. Anyway, decided
to add some gun fire to this in Photoshop, just to liven it up a bit. In
the actual animation, there will be interactive lighting on the set and
soldiers when the muzzle flash appears on each frame.
November 4th, 2009

Began working on shot number 2 from the title sequence. The above panel is a combination of different video frames where the camera tracks a young village boy running through the jungle. There are a variety of trees and plants in this shot that have to be replicated fairly closely, even though they sort of swish by the camera quickly.
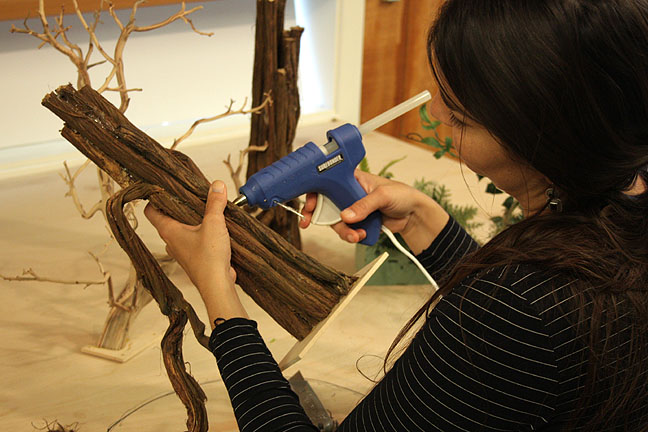
Here
Brandi applies hot melt and bendy-branches from a local flourist shop to
create some of the various hollow trees seen in the sequence.
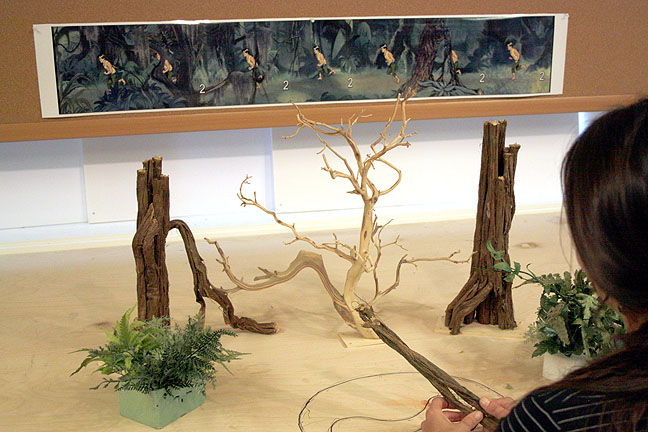
Here's a collection of some of the trees and plants Brandi has gathered in preparation for the shot. There's quite a bit of background foliage, vines, bushes, etc so she's still got a ways to go.
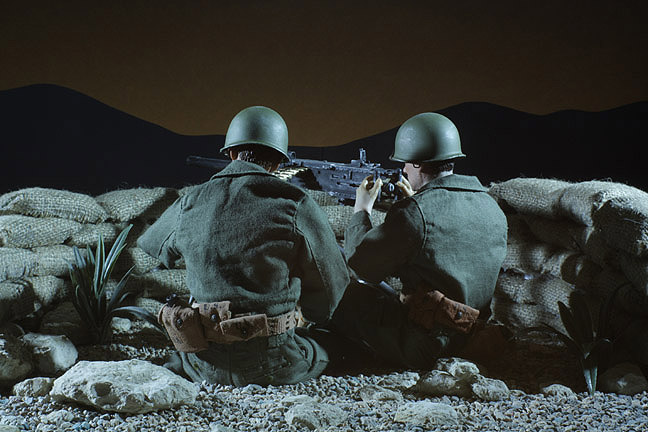
In the mean time, did some final lighting tests. I added some orange gel to the horizon light which not only added some warm color to the sky, but subdued the horizon. I also simplifed the shape of the hills in the background so as not to call attention to them. I found the previous horizon too distracting in a Bugs Bunny/Road Runner kind of way. As mentioned before, this shot will have a slight rotation to it, even though it only lasts 33 frames!
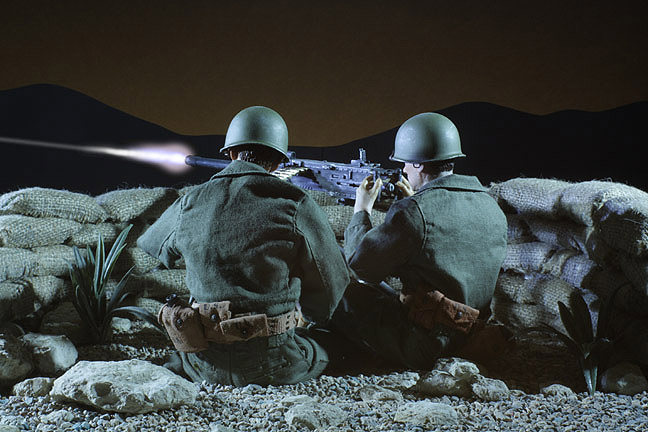
This is the same position but with interactive lighting from an LED penlight aimed at the gun and soldier. I dropped the reddish glow from the barrel and decided to go with something that was more white hot, which ties in with the lighting in their faces and on the sandbags.
If all
goes well, we should animate this scene tomorrow afternoon! Whee! :)
November 8th, 2009
Finally!
Spent the day animating the machine gun nest. Here's a shot of the set
up.
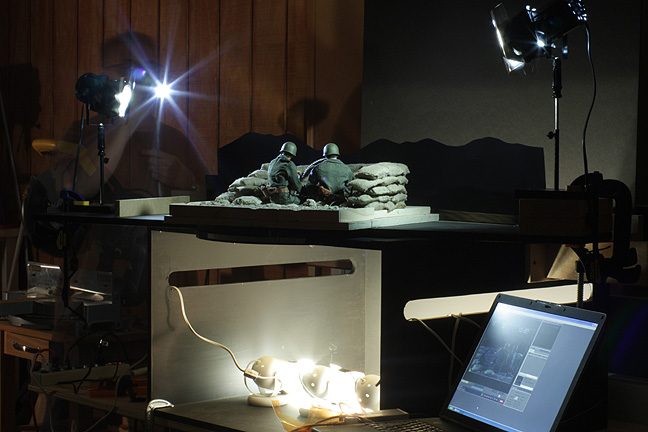
That's
me in the back, pointing a really bright LED penlight for each frame that
requires
a muzzle
flash. The penlight illuminates the faces and sandbags only on those frames.
In the
foreground, you can see my laptop which takes a feed from the video out
of the
digital still camera for reference.
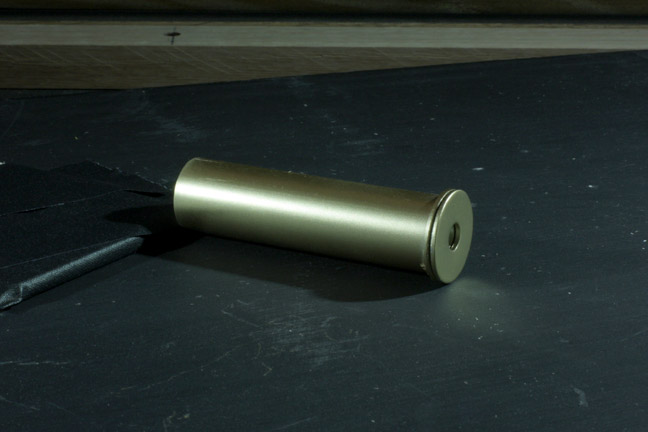
After
completion of the shot, I then needed to construct a single shell casing
to be
animated ejecting from the machine gun. I just grabbed a piece of PVC
and
then hot melt glued a couple of washers I had hanging around. A quick
coat
of gold spray paint and, voila! A 50 calibre shell !
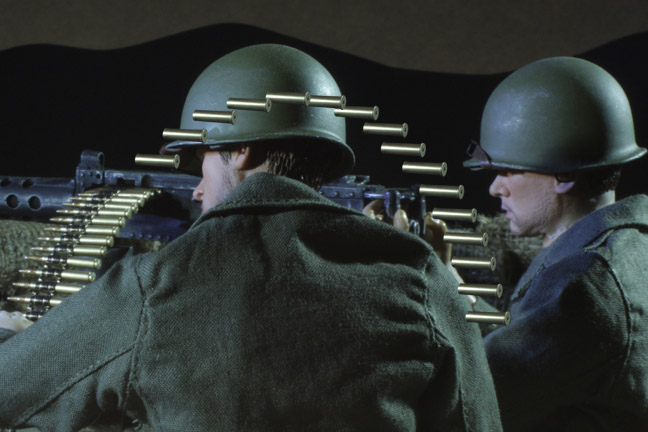
I then
took the photo of the shell casing into Photoshop where I matched
the
size and color of the original casings on the model. I then worked
out
the "flight path" of the ejecting casings and devised a simple
animation
cycle that repeated across three frames. Since the shot
was
only 33 frames long, I just pasted them into the scene, one frame
at a
time. I had to erase any areas where they passed behind
the
soldiers, of course.
Okay!
If you want to see the final animation on this shot,
turn
up your speakers and click HERE!
November 14th, 2009
Began prepping for scene 13, which is short but kinda involved.

These
guys have funky, avacado green helmets and gloves and weird, short rifles.
Their helmets have some sort of Vader-esque breathing thingy that attaches
to a panel on the belly of their baby-crap-green jump suits. Not being
able to find actual jump suits, Brandi took some regular green fatigues
and bleached them, which happily made them turn a less offensive light
yellow. We then put the shirt and pants on backwards so that any buttons
were in the back. With a wide, black belt, this gave us the impression
of a one piece jump suit.
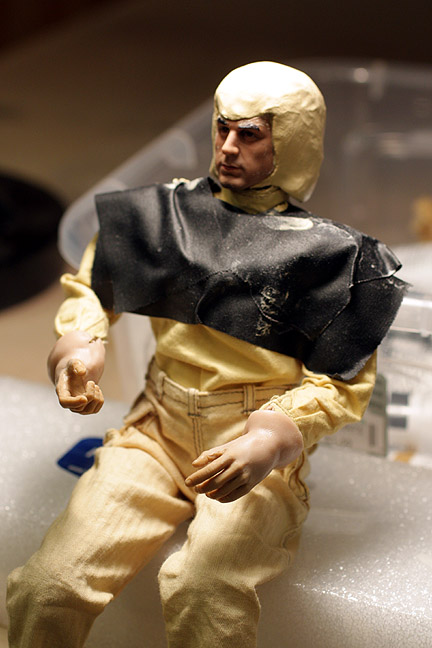
The helmet
was problematic in that it had to cover the entire head and, in typical
Escher fashion, the head needed to bend to one side in a way that would
be impossible if the helmet really went down to the shoulders as it does
in the drawing. So I made an executive decision to shorten the length of
the helmet to leave room for head tilt. To make the helmet, I covered the
head with wood putty in a rough shape and let it dry. I used Super Sculpey
to simply add gauntlets to the existing hands. Interestingly, when the
Super Sculpey is painted over with acrylic paint while the clay is still
soft, the clay retains elasticity as no air can get to it! Very handy.
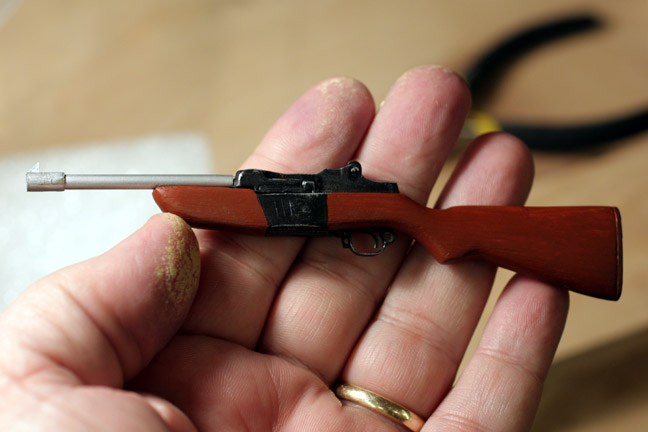
The gun
had to be fabricated almost from scratch. I used an existing rifle and
then shortened the stock on the barrel end, filled it with wood putty and
then sanded the end to round and taper the stock. I created a totally new
barrel out of plastic tubing from an ink pen. A coat of brown paint for
the stock and silver paint for the barrel and the job is done. But the
tiny scale was s real pain in the butt to work in.

Here
the helmet has been sanded smooth. I must say that this worked out much
better than I had hoped. However, sculpting with wet wood putty is like
trying to shape something out of melting butter. It is definately a learned
art form. The black tape is to protect the clothing from drips and paint,
etc.
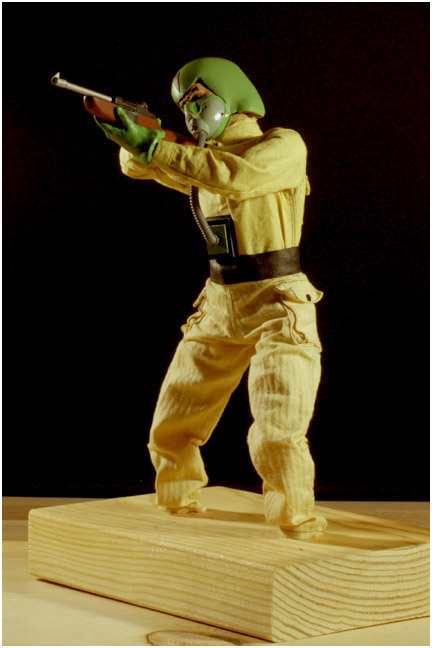
As this was a very unique build, I just created one green-helmet-dude and will shoot him in two different positions. His feet do not show so I just pulled them off and stuck his legs into a couple of holes in a block of wood. His face mask is a modified breathing mask from a jet fighter pilot helmet. I also painted some more angular eyebrows to make him look meaner and more like the drawing.
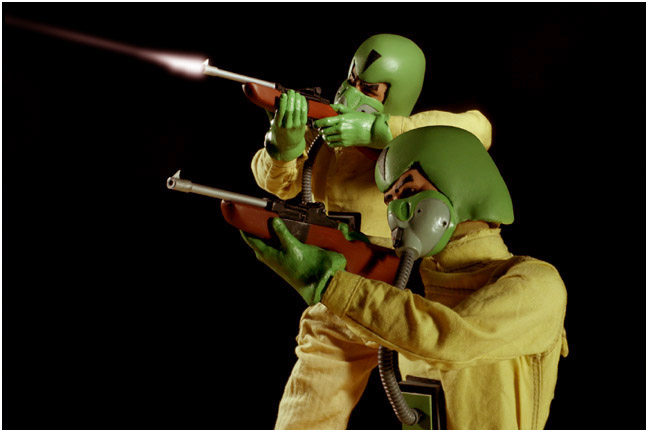
And here's
a quick composite/lighting test below the original drawing for comparison.
The
background of the cartoon was just nebulous blue. But I will be using a
rock cave wall in the finished shot.
November 15th, 2009
Set
up the cave interior for scene 13.
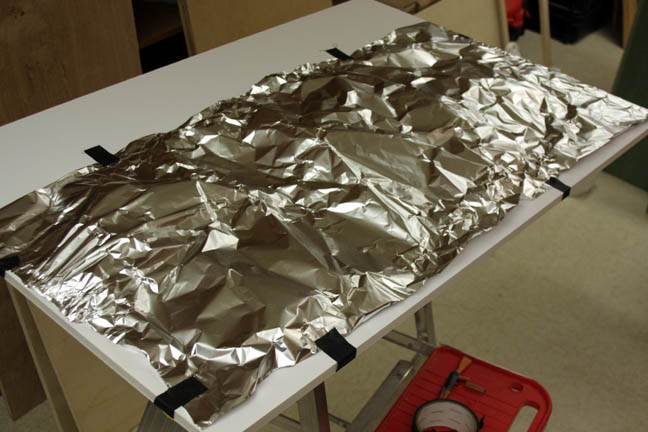
As the shot goes by in only about 30 frames, I felt there was no need to break out the plaster. Just tape some wrinkled foil to a piece of foam core board and give it a couple of coats of grey and tan spray paint.
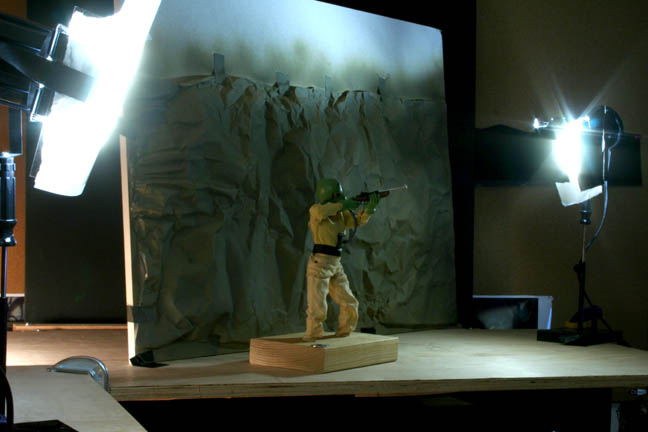
Here's the set up ready to shoot. You will notice that the green-helmet dude is facing the wrong way. This is because his hands are specifically molded to hold the gun a certain way. I guess everyone in his tiny world is right handed. Anyway, as the shot calls for two dudes and I only built one, I was going to have to composite the two together, anyway. So I just shot him facing to the right and then flipped it horizontally in Photoshop. I then reversed the lighting and faced the green-helmet dude the other direction for the second shot. I also decided to bring the light level down and use mainly rims instead of the brighter light that I had in the previous sample photo. I made this decision because there is a lot of gunfire that will illuminate their faces here and there. Making it a bit darker really accents the muzzle flashes.
Okay!
Ready to watch the animation for this shot?
Then
turn up your speakers again and click HERE
!
November 20th, 2009
Began prepping for scene 2, which is about 3 seconds of a man or young boy running through the jungle (hard to tell).
Decided
to test the feasibility of using a real boy dressed appropriately and then
shooting him running using a high speed shutter to freeze the action. I
would then use the footage to create a running cycle. These individual
frames would either be used directly or as a reference to animate a puppet
scaled to the appropriate size.
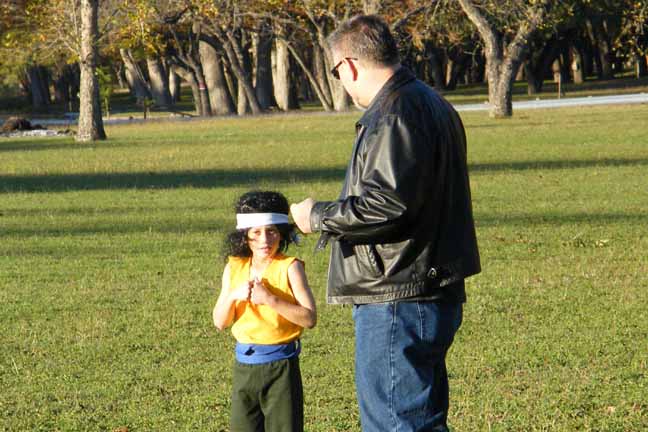
I recruited
the son of my secretary, Sugar. His name is Jaren and he was game enough
to wear a black wig and some torn clothing and run barefoot on a fairly
brisk winter day. What a trooper. We purposely exagerated the hair and
clothing in a basic attempt to make him look more "puppet-like". This was
necessary in case I decided to use the actual footage of him running. I
wanted to make sure that it mixed in with the rest of the stop motion shots.
By using a high speed shutter, his body position would be "frozen" and
exhibit no motion blur which, theoretically, should make him look more
animated and less fluid.
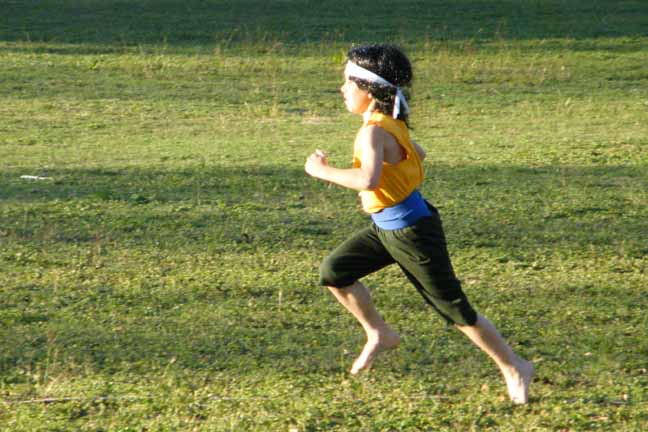
Here's
Jaren strutting his stuff for the camera.
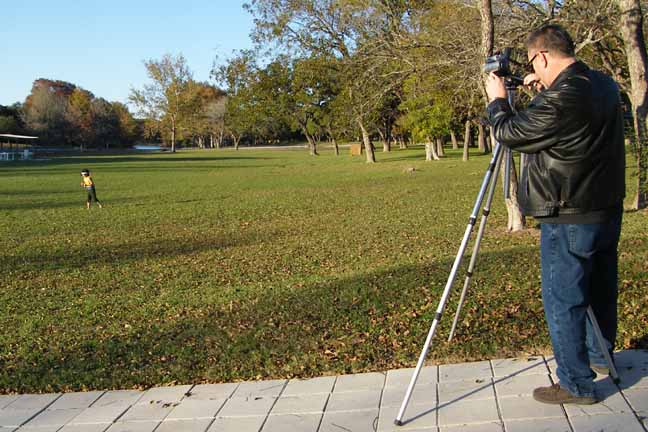
Kind
of hard to tell but I had the camer turned side ways so that I could maximize
the resolution of the image in the HD video frame. In other words, I was
shooting him running as a vertical, which meant that the captured footage
was sideways. But that was easily rotated in post for proper viewing.
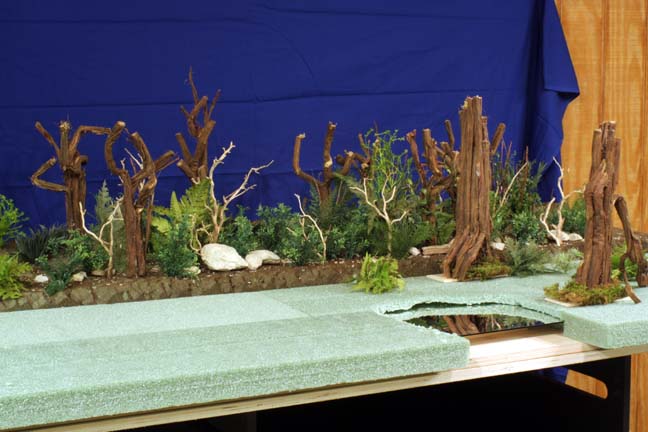
Here's
the jungle set under construction. Note the first surface mirror inserted
into the set as a pond. The set is actually in three sections. The front
two sections move independently with the foreground moving at twice the
speed of the mid ground section, while the back section does not move at
all. This will create a multiplane effect that will force the perspective
of the set while the camera appears to track with the running boy or puppet
(still haven't decided).
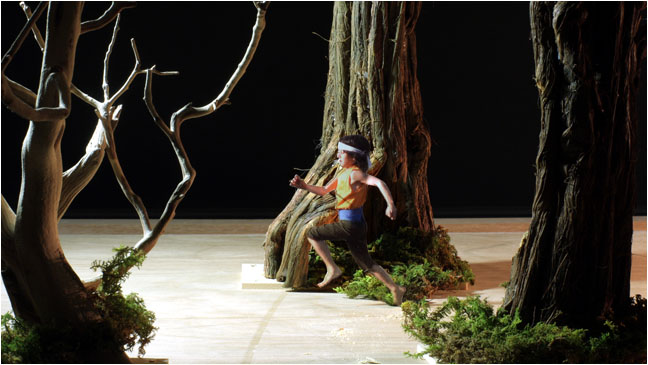
Two different
lighting tests. One above and one below. Both on an unfinished set.
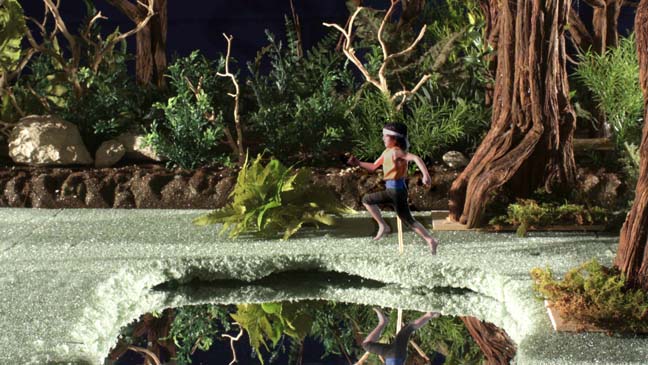
Obviously,
the set still needs to be painted and plants added, etc. But this should
give me enough information about lighting and whether to use the photos
as replacement animation or whether to use a puppet. The jury's still out......
November 22th, 2009
So the jury's in and I have decided to go ahead and make a puppet. The photo cut outs would work perfectly fine but I really want to have the camera rotate around the subject and the flat nature of the photo cut outs would not allow that kind of depth and movement.. Also, upon closer inspection, the guy running isn't a young boy but, rather, a small man. So I decided to whip out a puppet. Here we go!
Puppet Making 101:
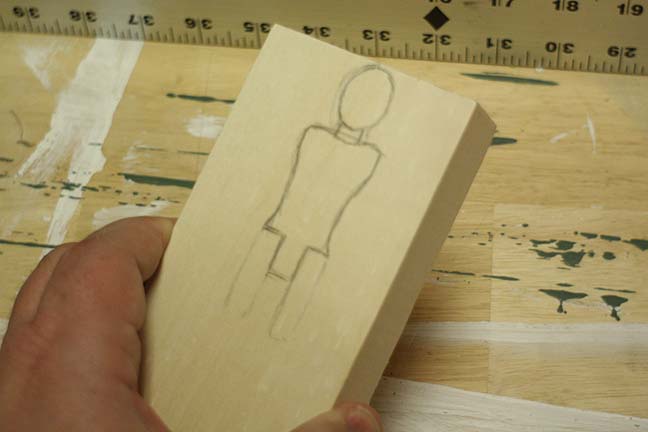
First
I roughed an outline on block of wood.
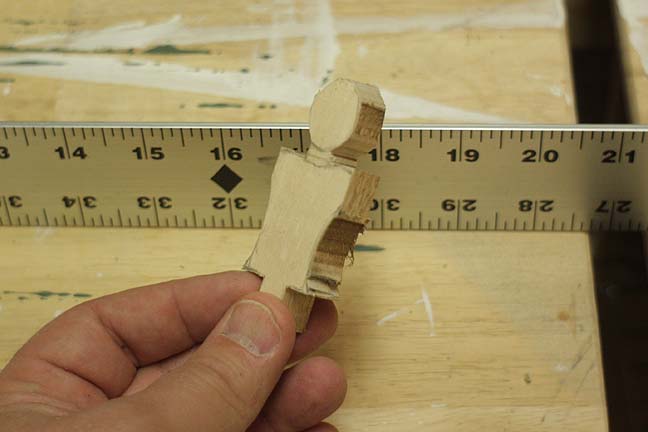
Next
the figure is cut using a band saw.
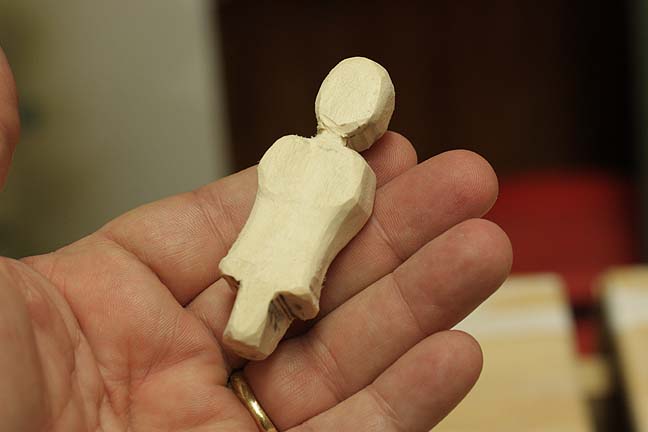
A bit
of sanding to give it some shape.
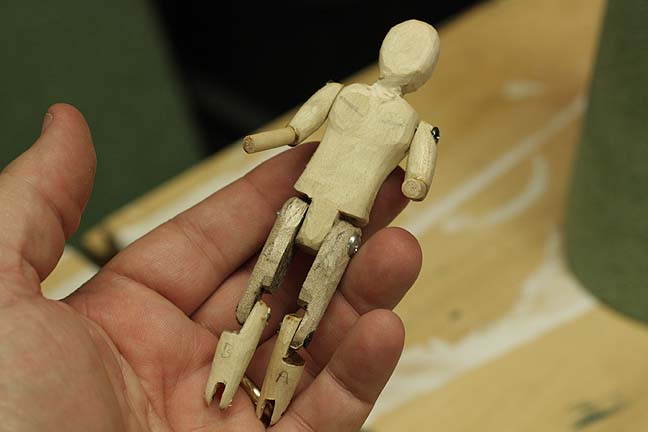
Normally,
I would make a metal ball and socket armature. However, since this puppet
is always running in a straight line, simple wooden swivels will work just
fine. Actually, swivels make animation of repetitive movements much easier
and more precise as ball and socket joints tend to "wander" and have to
constantly be kept in line, depending on the design of the armature. You
will notice that the arms have no joints at the elbow. After looking at
the reference footage, it appeared that just keeping the arms at an angle
while they swing would suffice. The head is permanently attached with no
joint, as well. This is because there is no need to turn the head and,
also, because the puppet will be supported by a bracket from above on the
far side of the head.
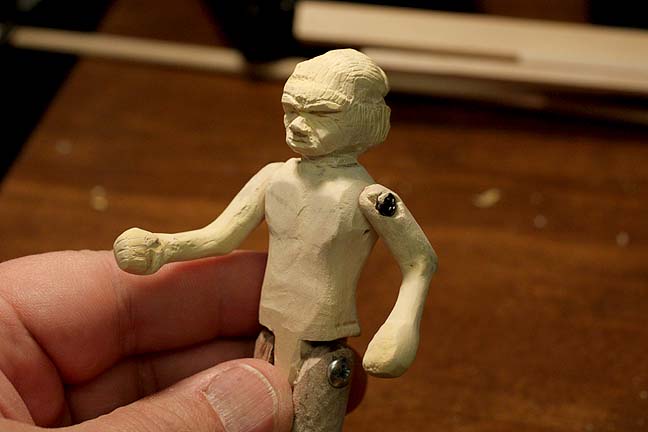
The head
was covered with wood filler and let dry and then carved. I gotta tell
you, this is a really, really tiny puppet, which makes carving and
sculpting a real pain. Since it appears the figure is a man, I decided
to make him an older man, as wrinkles and craggy features are easier to
produce in miniature than the smooth skin of a younger person. I also exagerated
his features into a more "native" look. The hair is sculpted in place
and a depression built in to accomodate the head band.
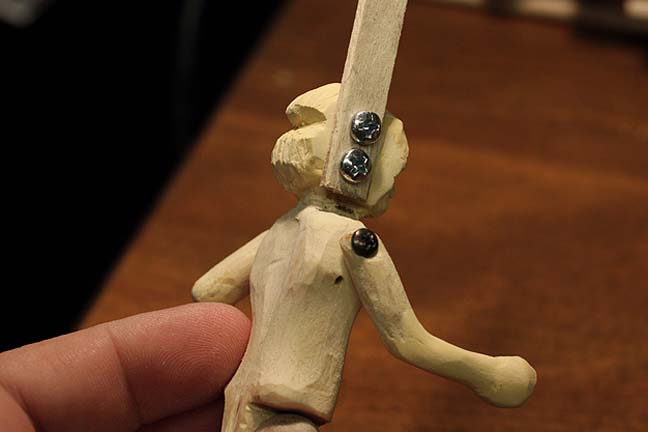
Since
the puppet is always seen from his left side, I was able to attach an overhead
support directly to his off-camera side. This support will have a positive
register that can repeatedly be removed or put back in place for each frame.
This will allow me to remove the puppet from the set, bend it into a new
position off-set by comparing it to a 1:1 frame of the running boy, then
put the puppet back in place accurately, as if it were pin registered.
However, while the puppet is absent from the set, I will shoot an additional
frame of the set "clean". This clean shot will be used to erase the overhead
support when the two shots are combined on a per frame basis in Photoshop.
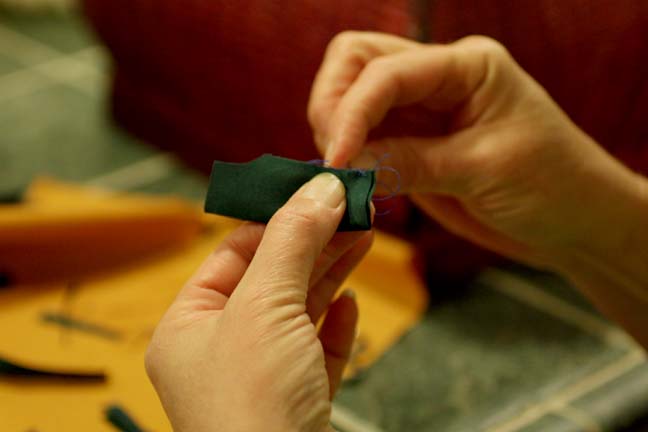
Unfortunately,
neither Brandi nor I sew worth spit, even for full size clothing. So I
needed to call in a pro. Here my wife, Annette, struggles with the tiniest
pair of britches she's ever handled (and you can read into that what you
will).
Below is another lighting test for the finished puppet.
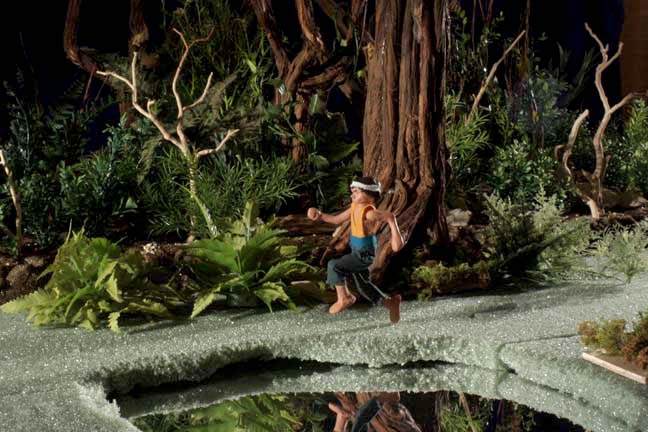
Again,
the set is not finished but this shot allows me to see what the completed
puppet will look like. In all, I like this much better than the photo cut
out, which mandated a side view. And using an overhead support instead
of traditional tie-downs allows the option of mid-air poses not usually
practical with tie downs through the toes. Though not as detailed as could
be achieved on a larger puppet, this will suffice for a wide, three second
shot of him in continuous motion. I color matched the acrylic paint on
his skin to some tan colored clay that we have in stock. That way I can
use the clay to cover the screw heads at the joints on his shoulders and
ankles. My goal is a level of realism that makes it visually interesting
while also reflecting the traditional "Hanna Barbara" look typical of the
series.
November 27th, 2009
Completed
the overhead support system for the puppet.
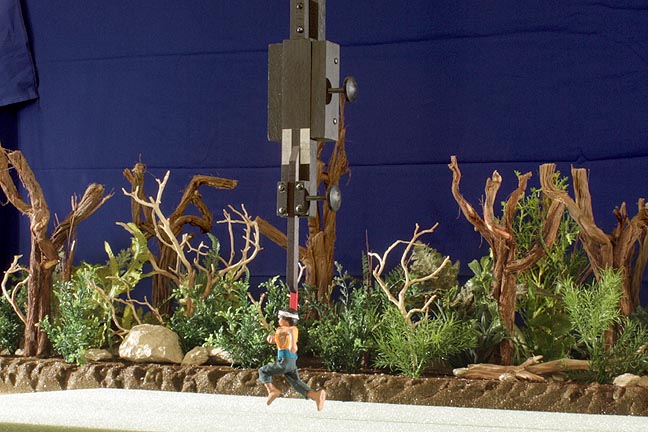
Again,
the set is not anywhere complete but I needed to get the overhead support
in place before making decisions about plant placement, running path,
etc. The top black knob is loosened so the entire lower support column
can be removed in between exposures. This is necessary for two reasons.
One is to reposition the puppet and the other is to take a second "clean"
shot of the set without the overhead support. Below is an example of how
this works.
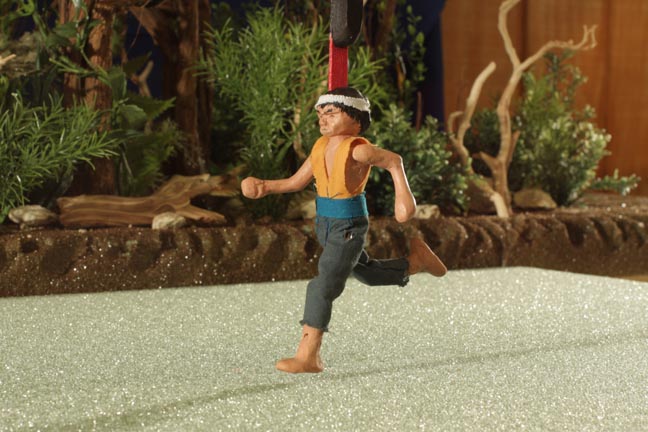
Above
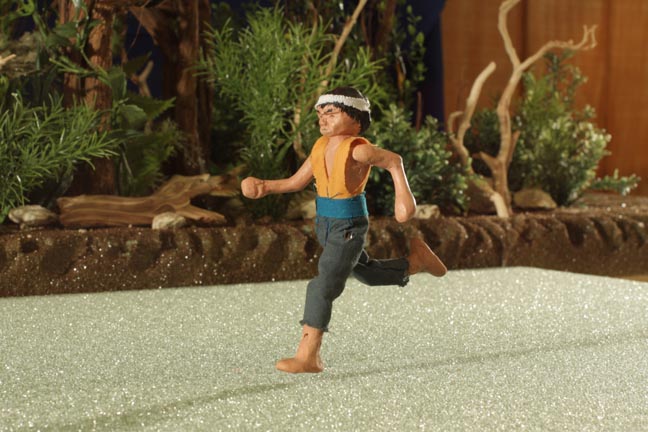
you can clearly see the support bracket above the puppet. The part of the
bracket behind his head was colored bright red so that I could key that
out and not have to manually roto (cut out) around his head for every single
frame. So the red allows an automatic cut and then final cleaning is done
using the erase tool in Photoshop.
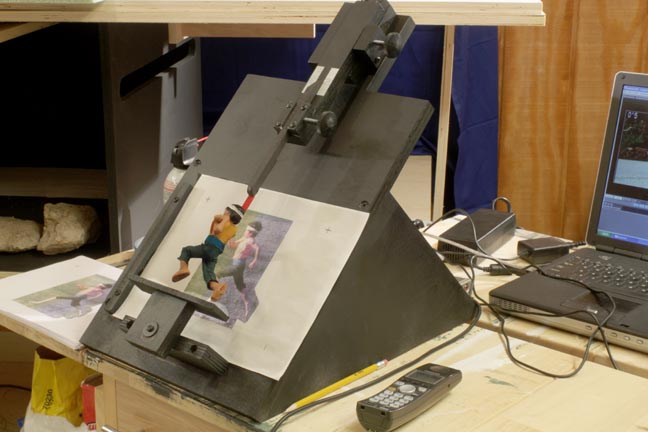
Above
is a frame where the bracket has been removed. The area directly above
the puppet's head is from a totally different frame.
In between
each exposure, the support column (with the puppet still attached) is moved
to a positioning easel. This easel has a locking system that is identical
to the one above the set. There are a total of 15 positions taken from
the footage I shot of the boy running. These positions form the complete
running cycle that will be used for the 3 second shot. Those have been
printed out onto 8.5 x 11 sheets, each of which will "corner up" for repeatable
registration. The puppet is then bent into a position to match the photo
on the paper.
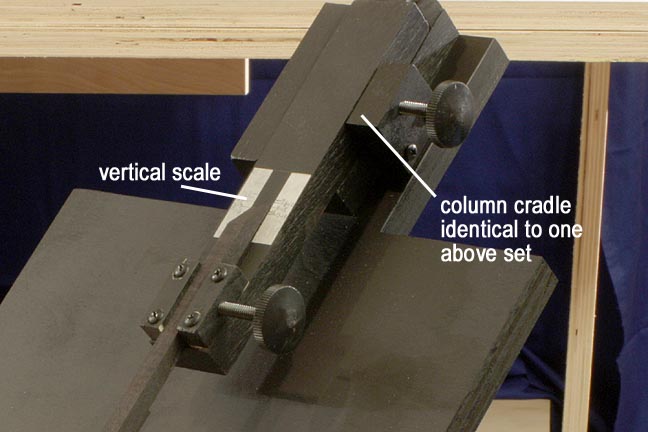
The support
column has a separate, smaller column that can be moved up and down independently
of the larger support column. There is a numbered vertical scale that tells
me what height to move the smaller column to raise the puppet up and down
for each frame. This is necessary since his running makes him move up and
down during the shot. Though this all sounds complicated, it really isn't.
I just move the set to its new position (since the background is moving),
put the column in place, take a frame, then loosen the top knob, remove
the column, take a "clean" shot, put the column on the easel, reposition
him based on the photo, then put the column back on the set.
I then
repeat this about 70 times for the entire clip! :)
I did a sample running cycle, just to test the whole concept. The background isn't moving, so the puppet appears to "moonwalk" but it shows that the system works.
Click
HERE
to see the run cycle test!
(no
audio).
Click
HERE for the next month.
All information, videos, photos and graphics in this website are copyright
2009, Roger Evans. All rights reserved.
For those that enjoy the creak of leather, click HERE
for my gallery of western art paintings