December
1st, 2009
Big day!
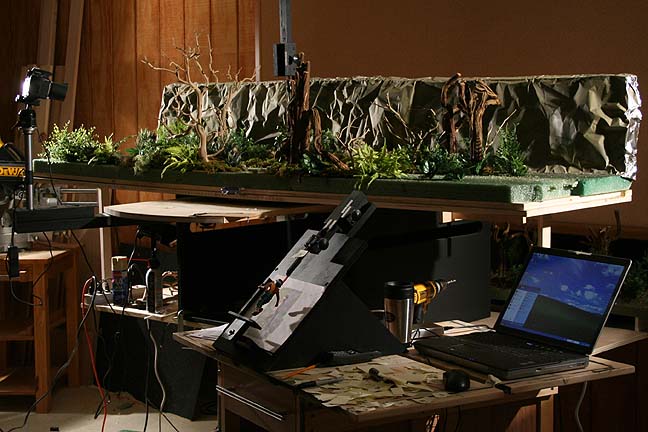
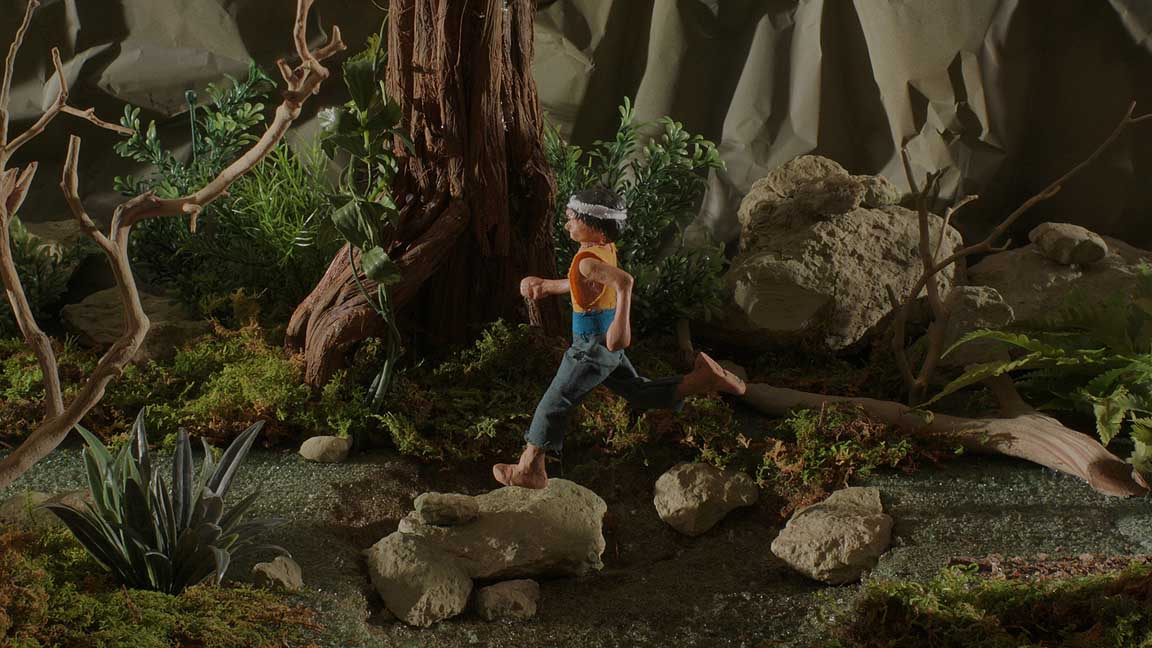
Completed the jungle-run set and made ready to shoot.
(For
a larger view of this photo, click HERE.)
The whole
set is about 8 feet in length and slides side to side in increments. Oddly
enough, this is just low-tech wood on wood. My wife, Annette, had the brilliant
idea to coat the platform with Johnson's Paste Wax. Incredible. You can
slide this huge, heavy piece of wood side to side with one hand effortlessly.
I may never machine another motion control track again. In the foreground
you can see the positioning easel with the puppet in place. The rocky background
is just foil painted gray/green.
(For
a larger view of this photo, click HERE.)
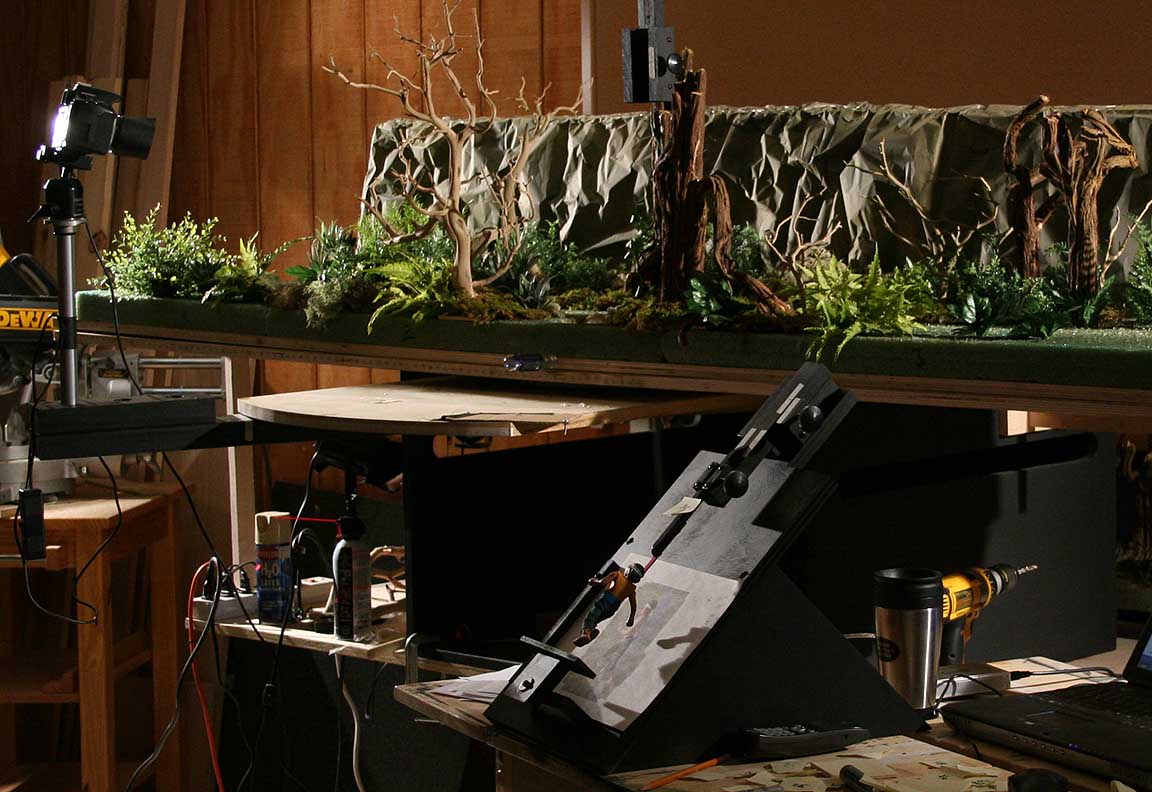
Here you can see the camera swing arm. The pivot point of the swing arm is directly underneath the puppet. So as the set is advanced side to side in increments, the camera swings in increments around the puppet. Interestingly, because all the increments are numbered and, because I knew the numerical sequence of the running cycle, I could predict where the set and camera would be for any given puppet position. This saved a tremendous amount of time because I could pose the puppet in position #1 just one time only and then slide the camera and set to the position that would correspond to that pose, take a frame, then advance the set and camera on down the line to the next set/camera position that would feature puppet pose #1, take a frame, etc. Then I would position the puppet in pose #2 and repeat through all 15 poses. Though the final animation has 84 frames with the puppet repeating its run cycle about 5 and a half times, I only had to animate the puppet one time! :)
Of course, since I was shooting the animation out of sequence, I made sure that I put a sticky note on the overhead rig for each shot with a number so I could put the individual frames back in order. Otherwise, it would have been a nightmare. The upside in doing it this way was that it saved time and wear and tear on the puppet joints. It also reduced the likelihood of errors. The downside is that I could not use my animation preview program to play back the footage as I shot. So I just had to forge ahead and see if it all worked after I was finished a few hours later.
Wanna
see what the final run looks like?
Then
click HERE!
(no
audio)
Because
the scene goes by so fast, I decided to post some larger images so those
interested can see the set detail.
Click
on any picture for a larger view.

To help
keep strobing of the background down, and to add some atmosphere, I decided
to add a bit of diffusion in post. This takes the edge off of the higher
contrast areas of each frame, which helps to smooth out the motion a bit.

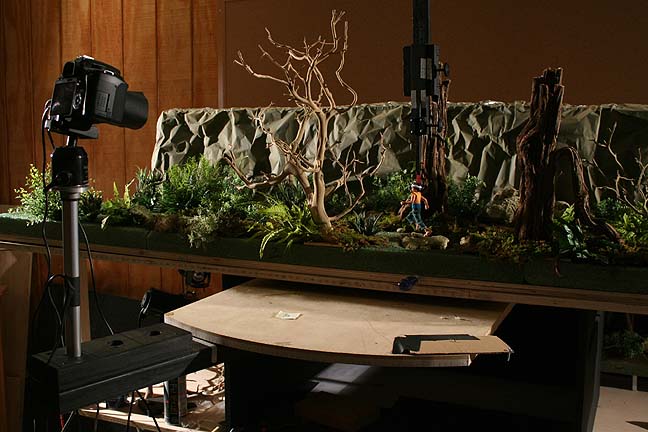
The ground
is just styrofoam that has been carved out and painted.
Rocks
laying in the parking lot add to the "panache" of the overall design.

This
tree is a natural limb that I found in a hobby store and it is almost an
exact match for the tree that you see in the original animation cartoon
version of this sequence. How lucky is that?

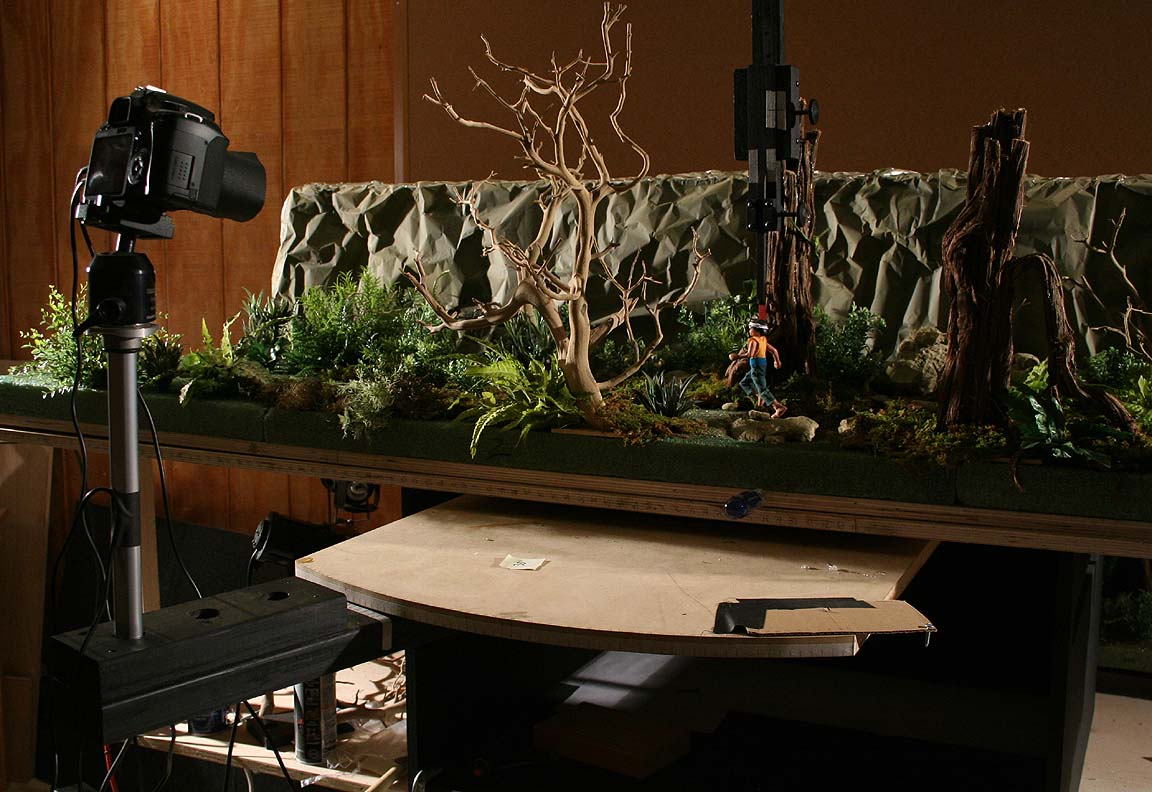
Since
the puppet doesn't require predrilled holes for tie-downs in the feet,
I don't need a solid surface for the puppet to "stand" on, which makes
styrofoam ideal because you can just stick plants and trees in it easily.
I found that "raking" the surface of the styrofoam with a putty knife helped
to give it a more natural appearance.
December 3rd, 2009
After much consideration, I decided that the diffusion layer robbed the animation of too much detail in the set. So I went back in and removed the diffusion and then worked with the gamma settings to lower the highlights. That basically achieved the same goal of minimizing the strobing but still allowed the detail to remain intact. I also picked up a bit more detail in the shadows.
Click
HERE
to see the new, improved clip!
(Note
this clip is about 5 megs. Please allow time to download.)
One thing
that you can do with the clip is to hit pause after it starts and then
use the slider to slowly progress through the clip. This will allow you
to really see the detail in the passing set as well as watch the motion
of the puppet as it goes through its poses. I tried to include as much
squash and stretch as I could to make what is otherwise a wooden puppet
seem more "fleshy".
Above is a still frame without the diffusion. Click on it to see a larger version. I like this better. :)
Moving on, Brandi started working on the Vulture (or is it a Condor?) from shot 18.
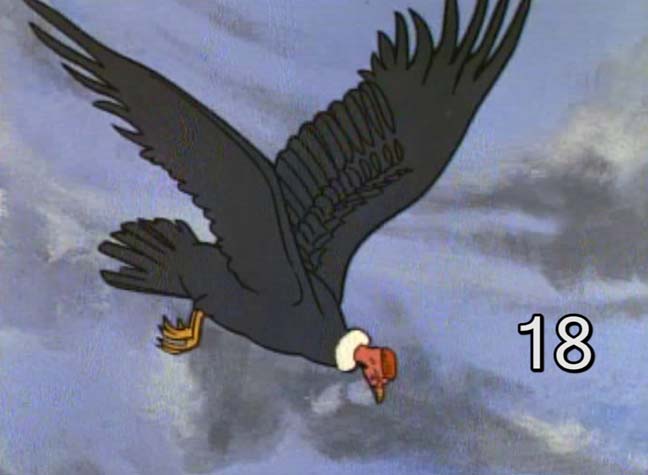
In the
cartoon opening, the bird never flapped its wings. But I decided that it
really needed some movement.
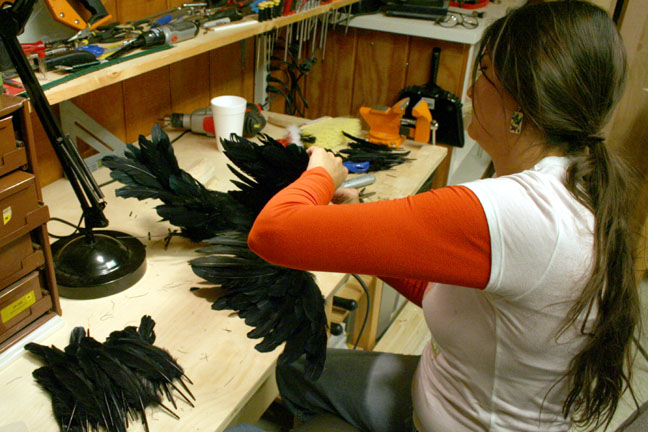
Here
Brandi is building the bird using feathers bought over the internet. Whether
they are Vulture feathers or not, I dunno. But the seemed about right for
our needs. I told Brandi I wanted it to appear a bit ragged, like it was
having a bad feather day.
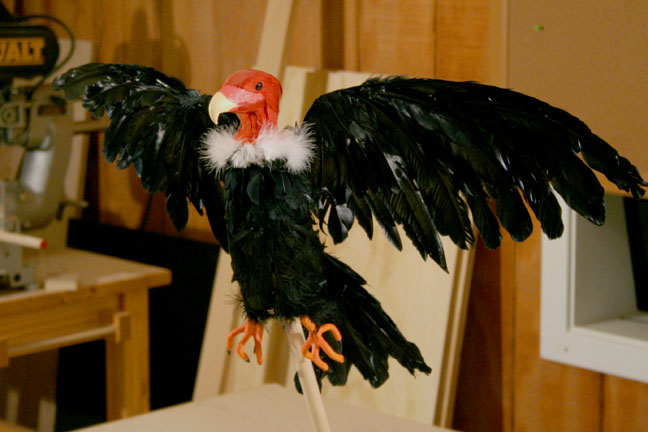
The bird
so far. Needs a bit of trimming around the collar and some work on the
eyes to "mean" them up a bit but the wings are positionable, as are the
feet. It will be supported by a pole up the wa-zoo during animation. Should
be fun to animate.
December 23rd, 2009
Been
sooooo busy with work. Not much time to work on the project. However, based
on the three shots we've done, I decided to take time out and build a more
advanced animation stage. I felt I needed something that would allow for
precision side to side movement, rotation, overhead support for flying
models as well as multiplane to force the perspective on moving shots.
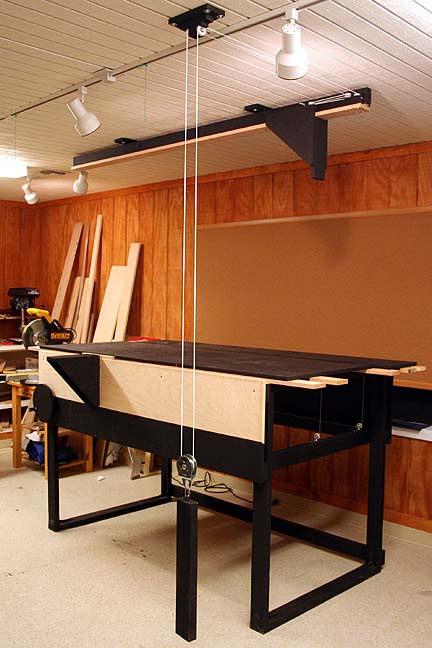
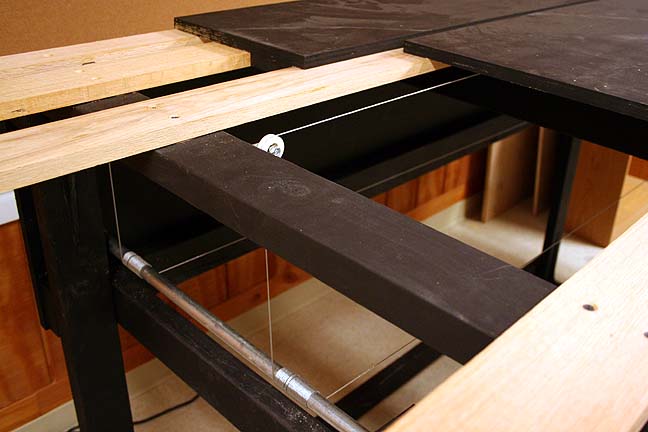
This
is what I came up with. There is an overhead gantry that allows for 7 feet
of side to side movement. The hanging, weighted cable in the front runs
to a three-fold block and tackle on the gantry which means that I have
to essentially pull three feet of cable to make the gantry move one foot.
This allows for more precise placement of the gantry for each frame.
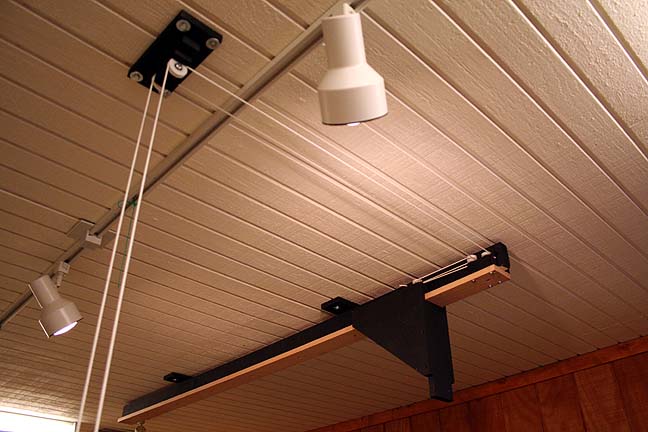
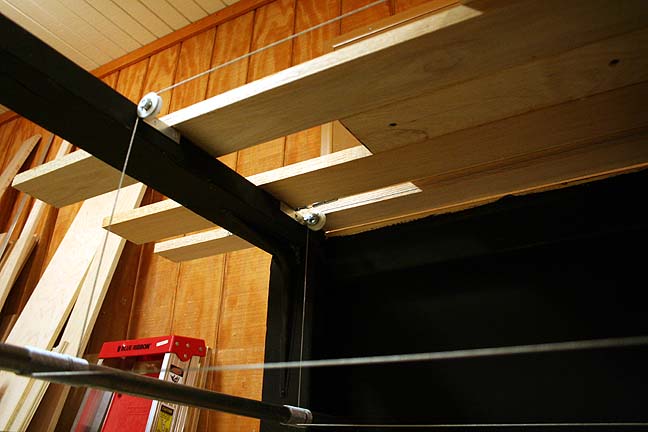
A close
up view of the rigging.
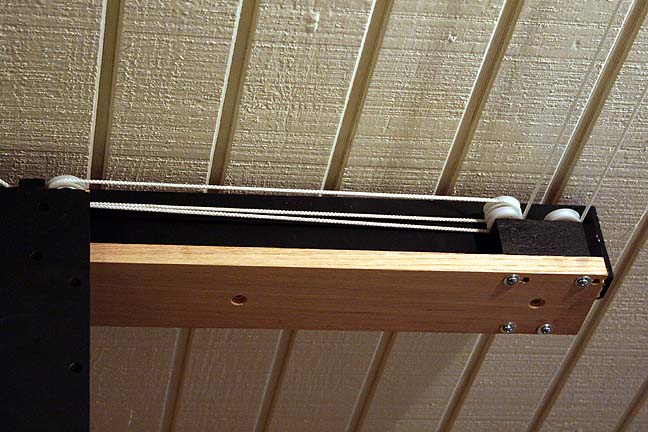
A closer
view of the block and tackle that reduces the motion of the cable movement.
The
runner that the gantry runs on is maple. Very hard wood. Very precise.
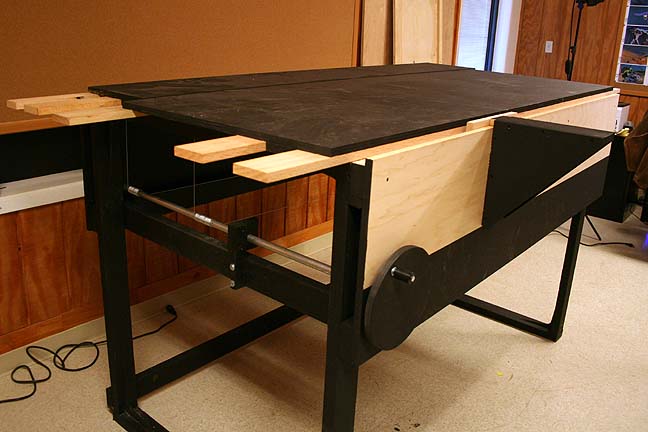
Here's
an alternate view of the table. The crank in the foreground moves the top
planes by way of aircraft cable, which will not stretch or lose tension.
Regular water pipe was used for the main shaft with a center support to
prevent flex.
The two
top planes actually move at different speeds by way of a two-fold block
and tackle on the back plane (not seen). This means that for every inch
the larger front plane moves, the back plane moves half an inch. This means
that I can put models or sets at one scale on the front plane, then
at half
that scale on the second plane. Even smaller models would appear beyond
the second plane. The front plane would naturally move faster than the
second plane, which would create a multiplane effect, forcing the perspective.
Items at the back that don't move at all would appear to be at infinity.
Overall, I can get about 4.5 feet of travel. Very handy.
A bottom
view of the cables and pulleys. The pulleys are found at the hardware store
and are normally used for sliding glass patio doors. They have brass bearings
and are very smooth. Turnbuckles were used to tighten the cables
after installation. All bare wood is coated with Johnson's Past Wax
to make the surfaces glide against each other. Only surfaces that have
no contact points were painted.
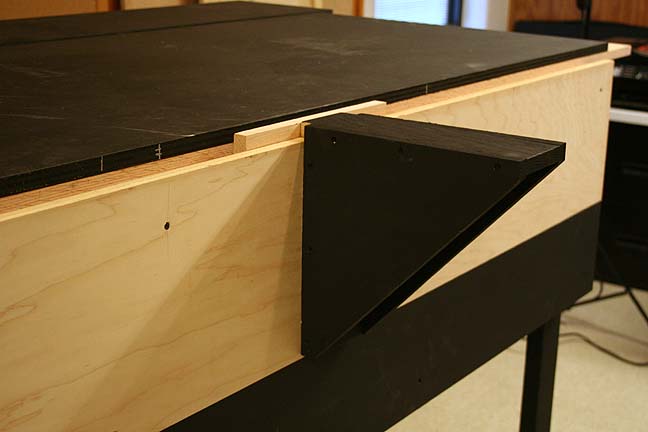
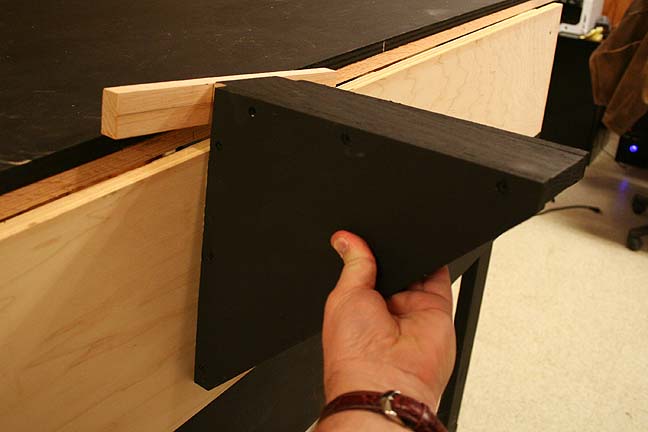
This
is an alternate camera support that can be slid along manually in increments.
It can also be used for foreground models that need to pass by the camera,
if it were mounted on a tripod. The cross piece hooks onto a lip that runs
parallel to the main stage. This means I can slide it back and forth or
I can simply lift it off, if desire. A lot of work but now I'm ready to
get back into some animation!
December 30th, 2009
Finally got busy with the opening jungle river scene, which is shot #1 of the opening titles.
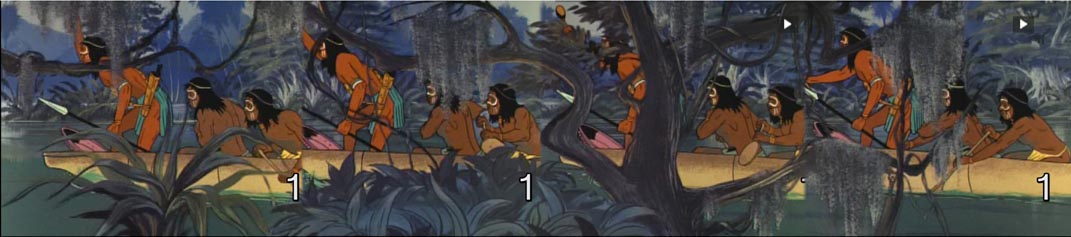
The above
drawing is a composite of several key frames in a panning shot where the
scenery moves left to right and the camera tracks along with the canoe
full of natives. There are actually ony three natives but the panarama
makes it look like there's more.
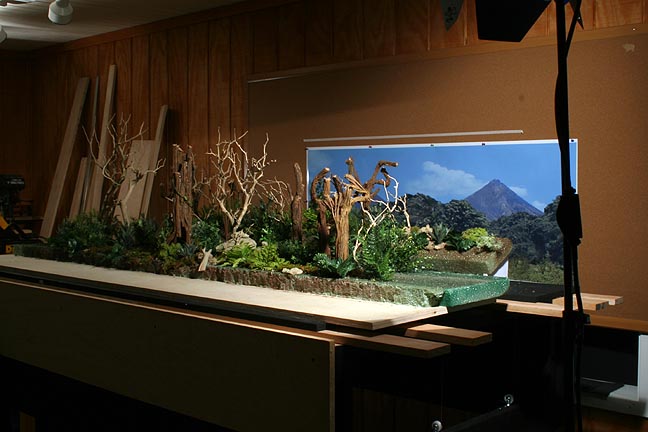
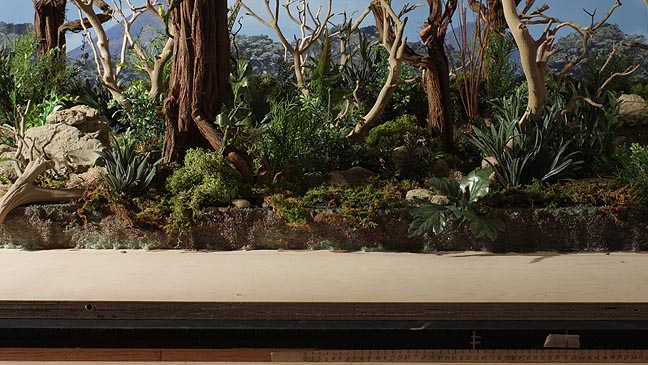
Here's
the set up on the new animation table. Note the two different layers of
trees, plants, etc.
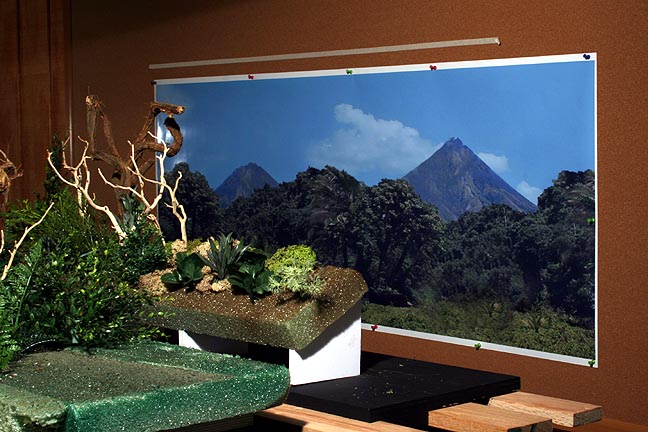
I managed
to combine a variety of hi-rez jungle and volcano photos into a single
backdrop. Because this scenery would be at infinity, it would not appear
to move, relative to the camera while the two foreground layers will move
at different speeds.
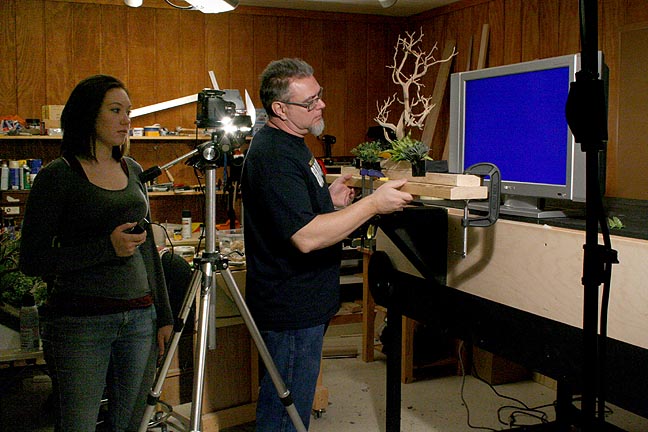
My daughter Kelsey was visiting from college and got dragooned into assisting while I animate the foreground tree and plants as they pass near the camera on a separate layer. This is necessary as I will be shooting the natives at a different scale and compositing them into the final scene.
I found that an old flat screen monitor makes a great bluescreen when it has nothing plugged into one of its video inputs. Pure blue and perfectly even distribution of color. Couldn't be easier.
How to make a jungle river set in three easy steps:
Step
one: Shooting the background on a multiplane table so that you have different
layers of movement at different speeds to add depth.
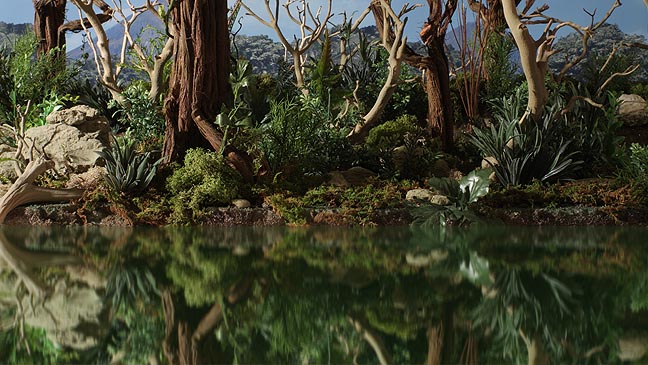
Step
two: In Photoshop, flip the imagery and the apply a slight vertical motion
blur and green tint to create a watery reflection.
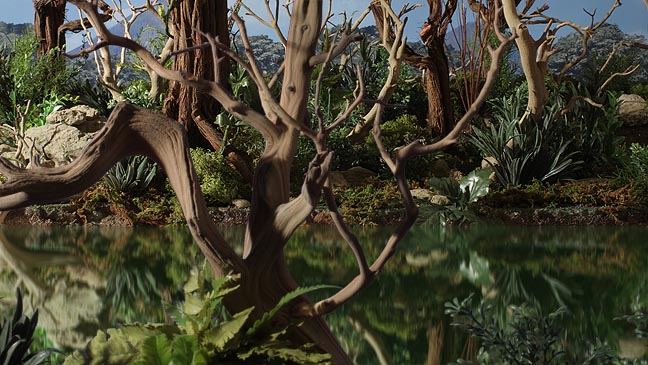
Step
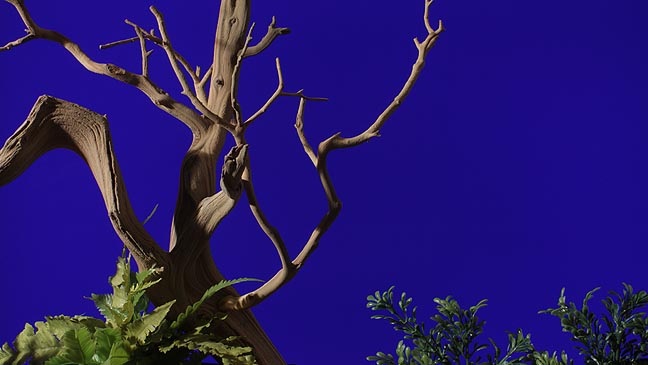
three: Add a moving foreground tree!
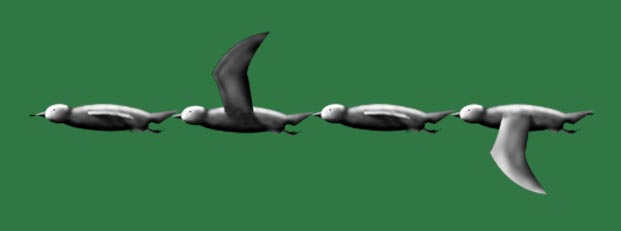
And just
to make it interesting, I created a tiny animated bird in Photoshop.
Click
HERE
to see the animated clip!
(About
5 megs so be patient. Also no natives in the shot, just yet)
December 31st, 2009
Closed
out 2009 by going native!
Here is what the natives in the canoe for Scene 1 look like.
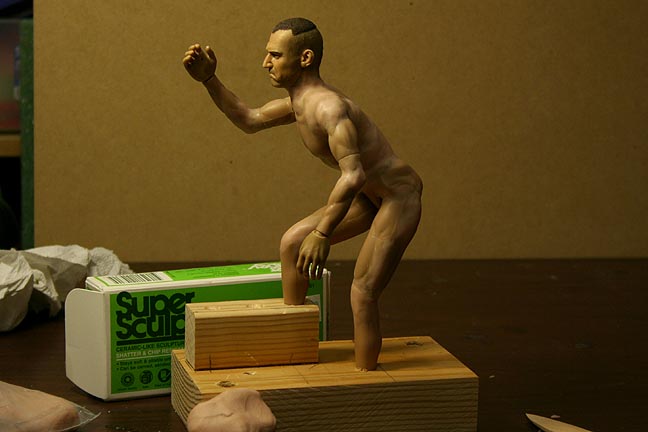
So to make my version of the native, I started with a standard military action figure.
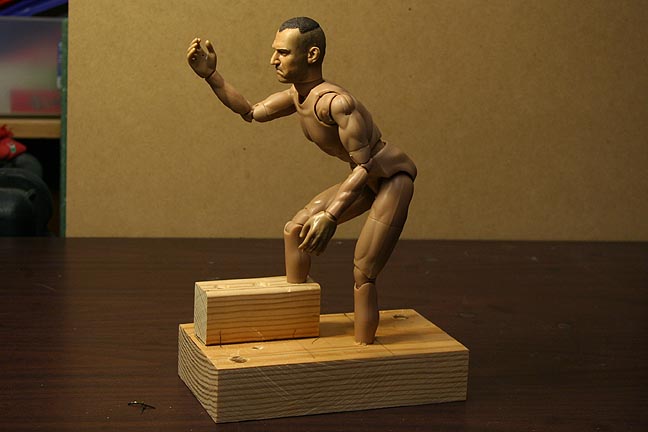
Fortunately,
Brandi was able to find a soldlier that looked supremely pissed off, though
his
position
here adds a whole new meaning to the term "Army Grunt".
Because
the feet will never be seen, I just drilled a couple of 1/2 inch holes
in a block of wood for stability.
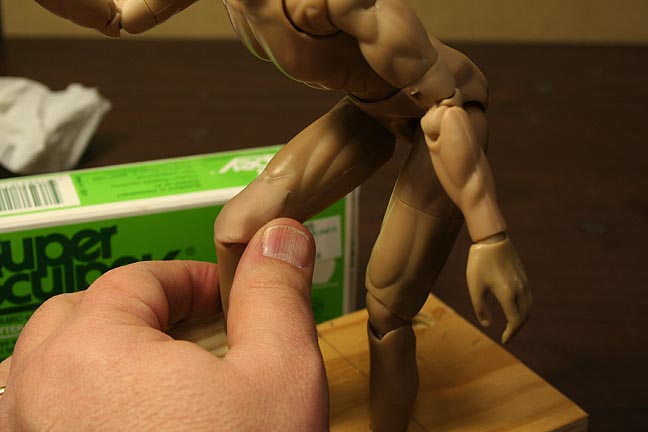
Though
I could sculpt the native from scratch, this saves a bundle of time. However,
I do have to use some Super Sculpey to cover the joints in the action figure.
Fortunately, the Sculpey is almost the same color as the plastic figure.
Here
the action figure has been completely covered except for a couple of strategic
joints that will remain open.
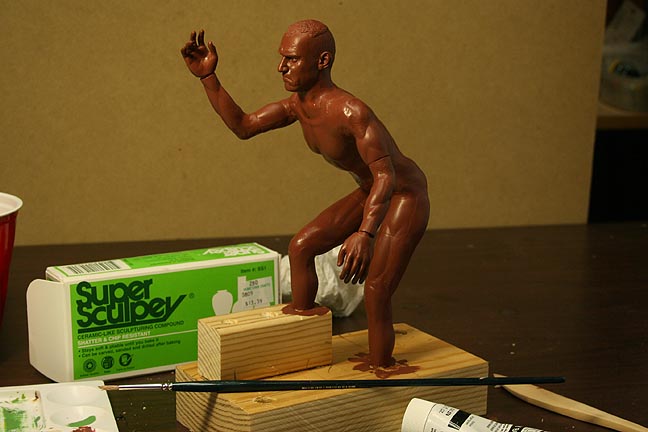
Next
the figure is given a couple of coats of paint. One interesting thing about
Super Sculpey is that, if you paint it before it dries, then it stays flexible
because the air never gets to it. Handy.
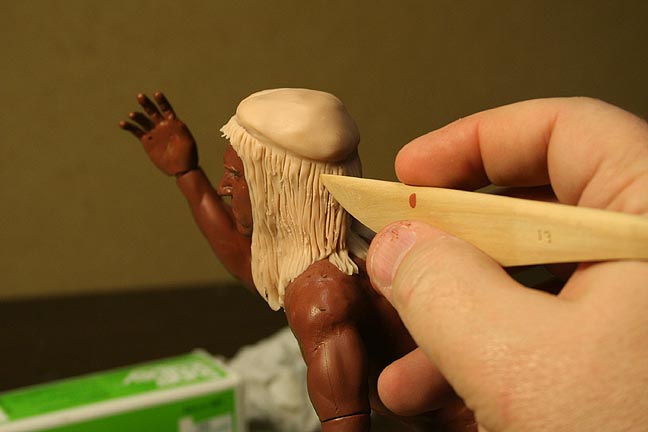
Scupley
is added to his head and hair is carefully scuplted in place. Note the
indention for the head band.
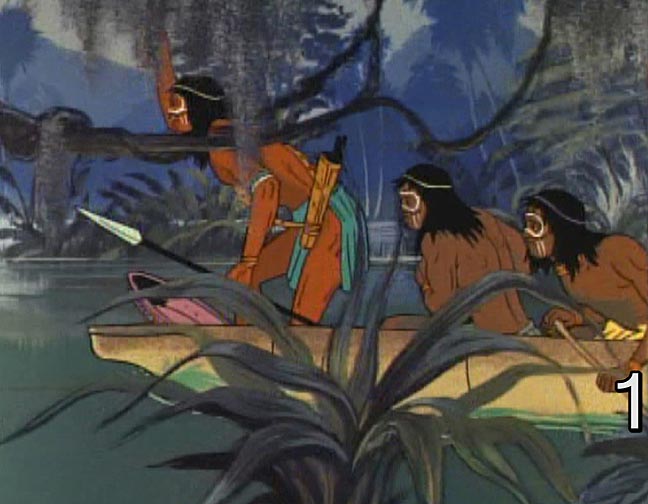
So, as
a comparison, above is the cartoon version of the native.
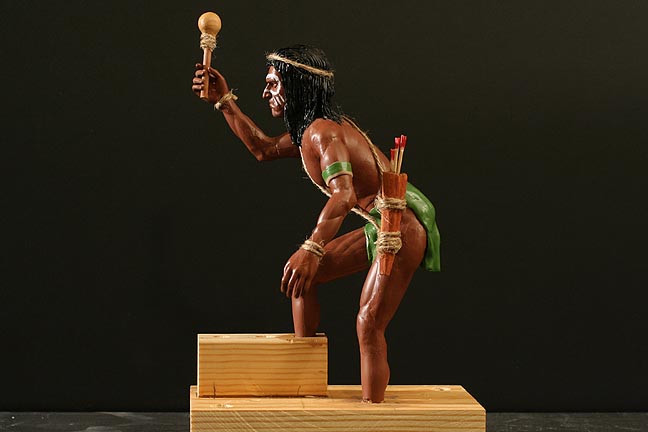
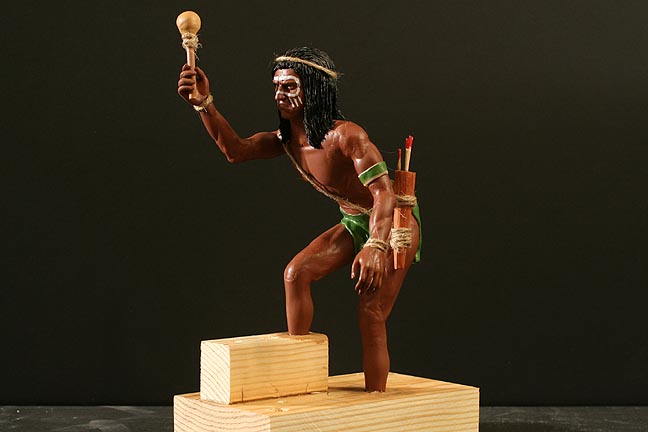
And here
are a couple of views of the finished native figure.
Brandi
did a bang up job on the arrow holder and arrows.
Click
HERE for the next month.
All information, videos, photos and graphics in
this website are copyright 2009, Roger Evans. All rights reserved.
For those that enjoy the creak of leather, click
HERE
for my gallery of western art paintings