As we work on this project,
different types of hardware
and processes are built and/or
employed.
For many
of the shots, I wanted to use low intensity, isolated lighting effects.
So I need to create some specialty lighting units. Being on budget, I decided
to purchase some el-cheapo desk lamps available from the Hollywood
Mega Store. Most video or film related lights are pretty bright and
that would create a lot of bounce, which is undesirable for some of the
scenes that take place at night or in subdued light. The machine gun scene
appears to be in daylight in the titles but, in the actual episode, it
is night or early morning. This means that I need to have some controlled
rim lighting on the soldiers. I also want to use time exposures of about
3-5 seconds per frame to cut down the likelihood of flicker from the 60
cycle tungsten lights combining with some flourescents that I intend to
use for horizon lights in some of the shots.

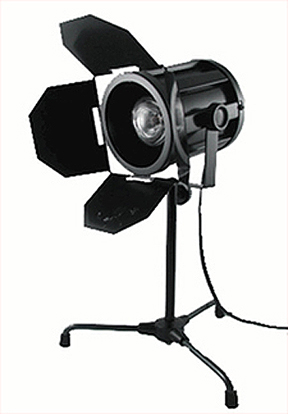
The stands
are way too short and the lamp they come with totally inadequate for my
purposes. But we changed out the lamp and Brandi painted the inside of
the housing with white enamel spray paint. Together, these made the units
much brighter and provided more even illumination. I can also put a small
spot in the housing, if I need a focused light source. In all, a very light
weight and cheap solution for the few shots that I need it on. But
the stands were not anywhere tall enough. Looking around in our local hardware
store, I found some screw drivers that had the right diameter shaft to
fit the stands. Removing the rubber revealed a convenient plastic handle.
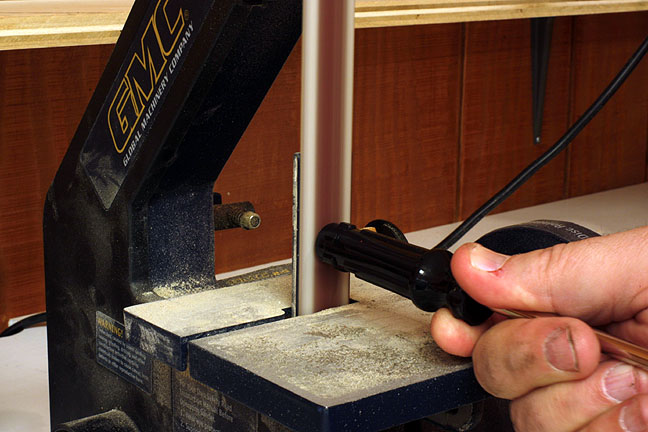
The end of the handle was curved so it had to be flattened out on the sander.

After
sanding, I then drilled the end of the handle for a mounting screw.
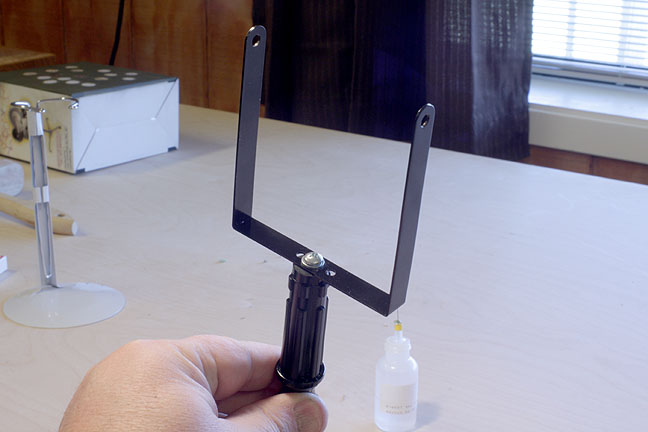
Then
I mounted the yoke for the light!
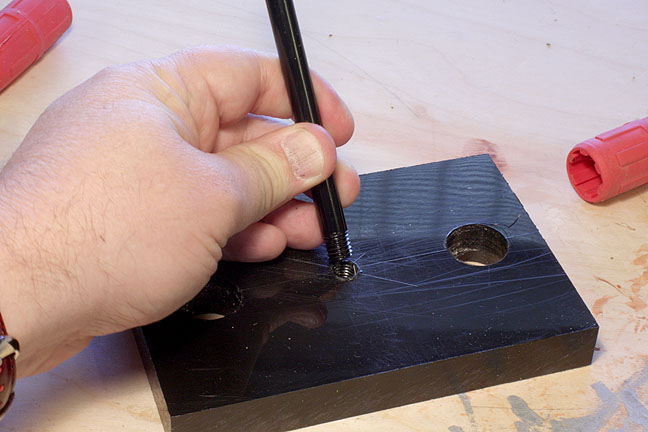
A
threaded hole for the base completes the modification.
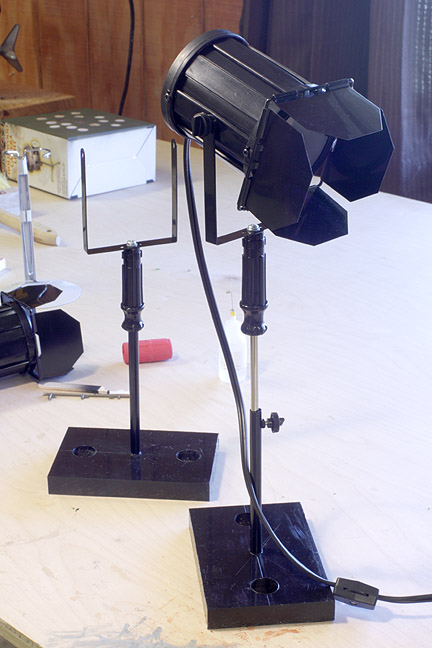
Compared
to the original, I now have a lighting unit that has greater up and down
range and a base that can be screwed down to prevent movement during animation.
And the plastic handle acts as a nice insulator if I need to move a hot
light! Not bad for a light with barn doors for under $50. ;)
After
completing the lights, I moved onto the shooting stage. Many of the shots
will incorporate a slight rotation in the animation to create a greater
sense of depth and movement. Naturally, if the subject rotates, that would
change the lighting and shadows. Also, you ideally want an animation stage
that is about chest high to make it easier on your back when working for
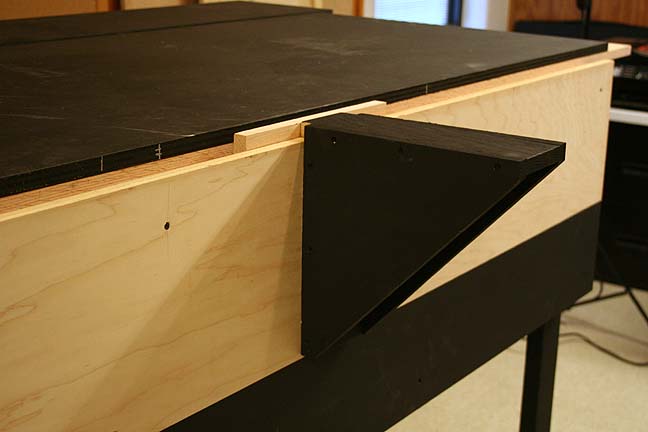
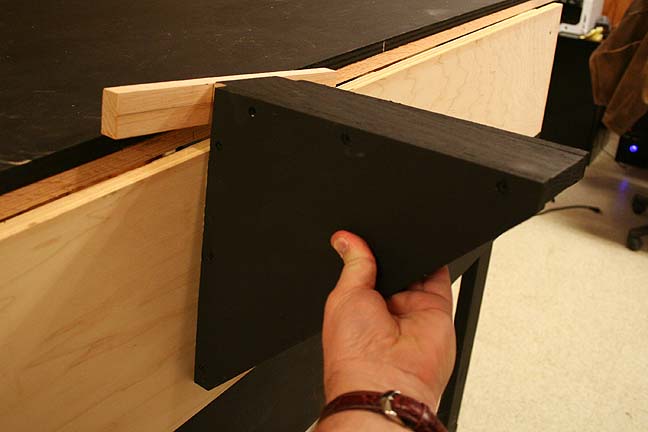
hours at a time. And the stage needs a separate background that can be
lit separately from the foreground model. So this is what I came up with.
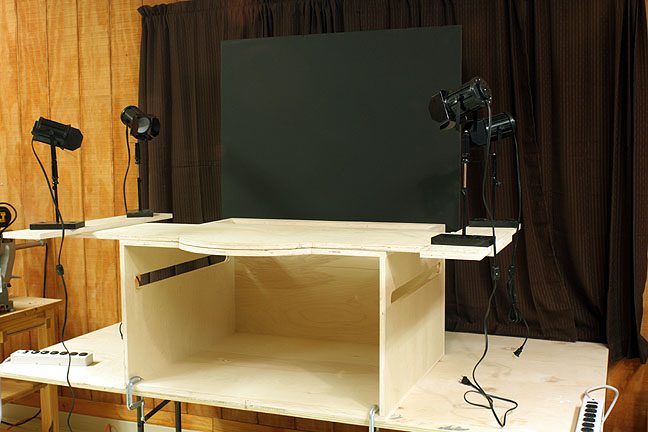
There is a long opening near the back where a light can be projected up onto the black background to create a horizon light. The upper platform can rotate on a central pivot and the new lightweight movielights can be screwed to the rotating platform and go along for the ride. The front lip of the platform is cut in a curve to allow for marking off increments for smooth moves. The whole assembly is light enough that it can be taken down from the work table by one person. This will probably all be painted black before production begins.
Based
on some of our initial completed shots we've done, I decided to take time
out and build a more advanced animation stage. I felt I needed something
that would allow for precision side to side movement, rotation, overhead
support for flying models as well as multiplane to force the perspective
on moving shots.
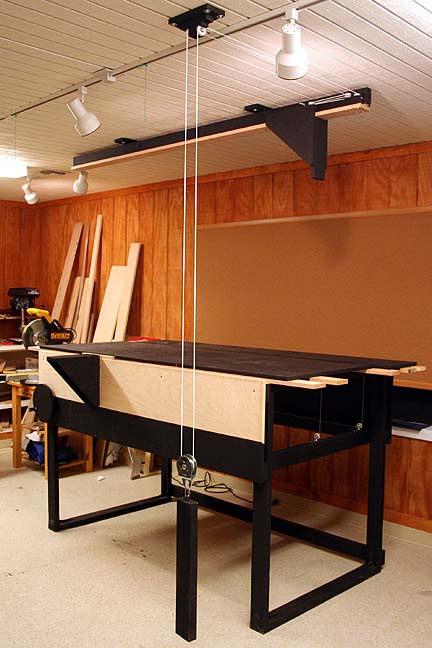
This
is what I came up with. There is an overhead gantry that allows for 7 feet
of side to side movement. The hanging, weighted cable in the front runs
to a three-fold block and tackle on the gantry which means that I have
to essentially pull three feet of cable to make the gantry move one foot.
This allows for more precise placement of the gantry for each frame.
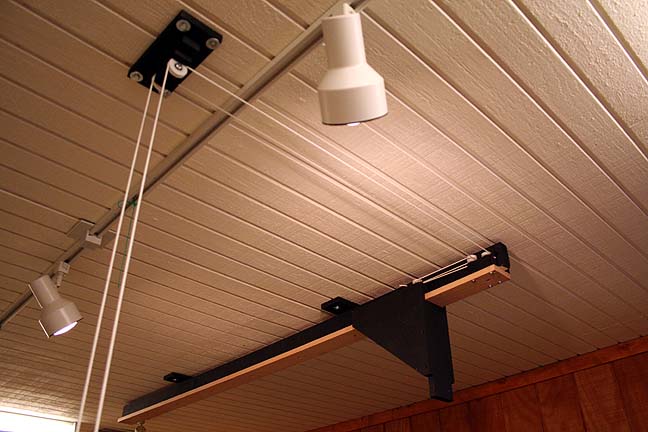
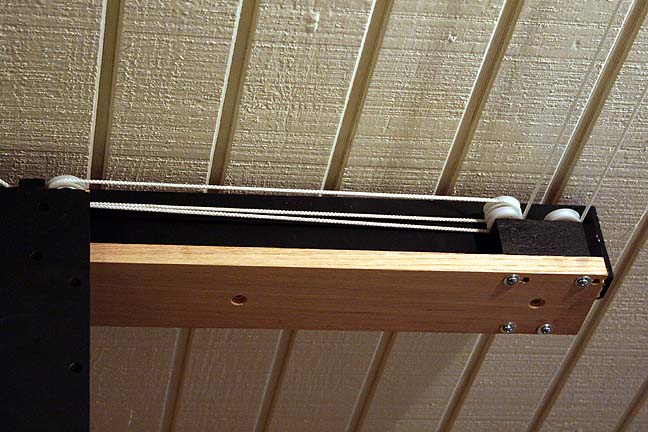
A close
up view of the rigging.
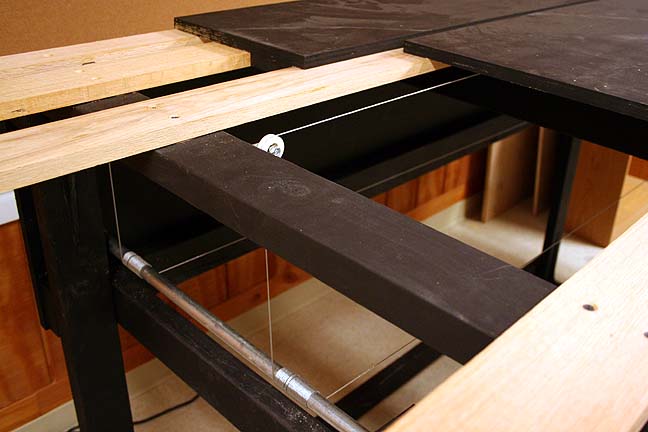
A closer
view of the block and tackle that reduces the motion of the cable movement.
The
runner that the gantry runs on is maple. Very hard wood. Very precise.
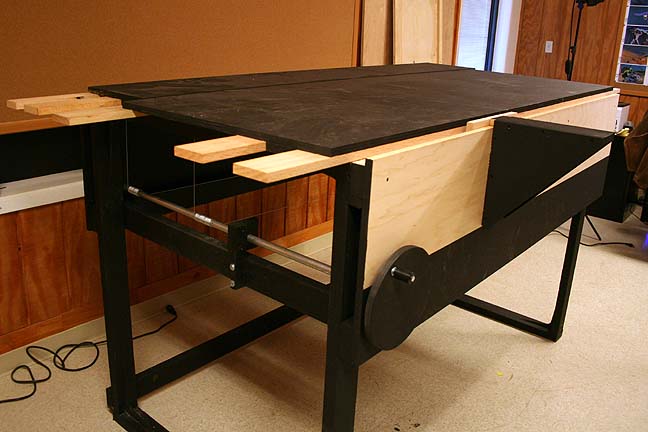
Here's
an alternate view of the table. The crank in the foreground moves the top
planes by way of aircraft cable, which will not stretch or lose tension.
Regular water pipe was used for the main shaft with a center support to
prevent flex.
The two
top planes actually move at different speeds by way of a two-fold block
and tackle on the back plane (not seen). This means that for every inch
the larger front plane moves, the back plane moves half an inch. This means
that I can put models or sets at one scale on the front plane, then
at half
that scale on the second plane. Even smaller models would appear beyond
the second plane. The front plane would naturally move faster than the
second plane, which would create a multiplane effect, forcing the perspective.
Items at the back that don't move at all would appear to be at infinity.
Overall, I can get about 4.5 feet of travel. Very handy.
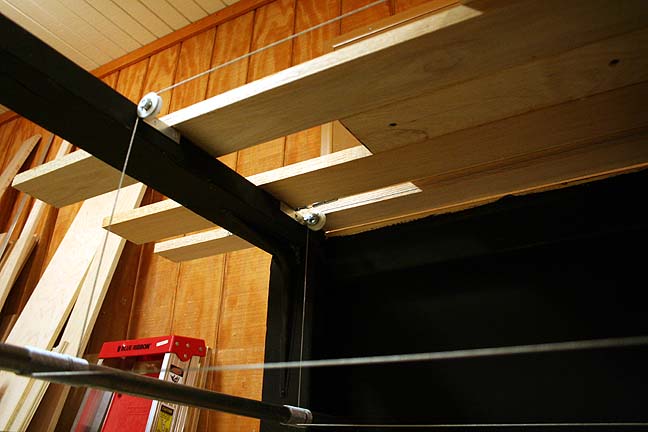
A bottom
view of the cables and pulleys. The pulleys are found at the hardware store
and are normally used for sliding glass patio doors. They have brass bearings
and are very smooth. Turnbuckles were used to tighten the cables
after installation. All bare wood is coated with Johnson's Past Wax
to make the surfaces glide against each other. Only surfaces that have
no contact points were painted.
This
is an alternate camera support that can be slid along manually in increments.
It can also be used for foreground models that need to pass by the camera,
if it were mounted on a tripod. The cross piece hooks onto a lip that runs
parallel to the main stage. This means I can slide it back and forth or
I can simply lift it off, if desire. A lot of work but now I'm ready to
get back into some animation!
Thanks for looking!
All information, videos, photos and graphics in
this website are copyright 2009, Roger Evans. All rights reserved.
For those that enjoy the creak of leather, click
HERE
for my gallery of western art paintings