For more information about how this shot was created, see below!
This clip was nothing short of goofy fun to produce, though very, very involved for only two seconds of screen time.
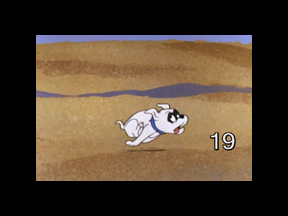
This is the cut where Bandit
is hauling ass while being chased by a big condor.
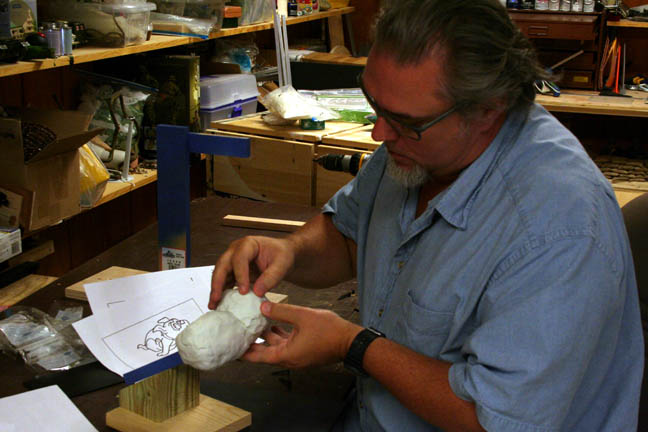
To start, we have to get out some clay! Since Bandit was running in place, I chose to sculpt a replacment animation cycle, which I could then composite onto the background later. The original cartoon version was really, really fast and used only four frames and no frame doubling! I played with the idea of replicating that speed but it just looked crazy in 3D. So I created some in-between positions to slow Bandit's run down to a more reasonable 8 frame cycle.
Click HERE to see video of me explaining the process!
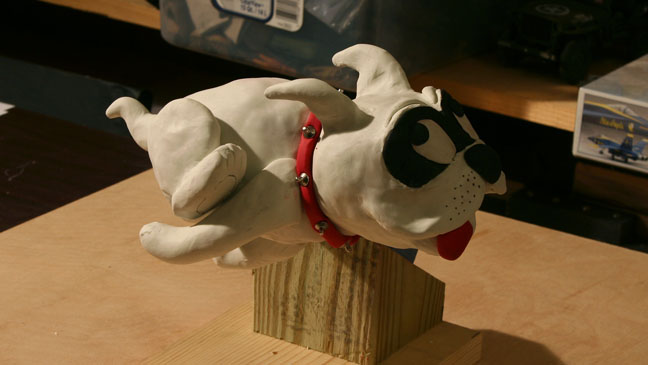
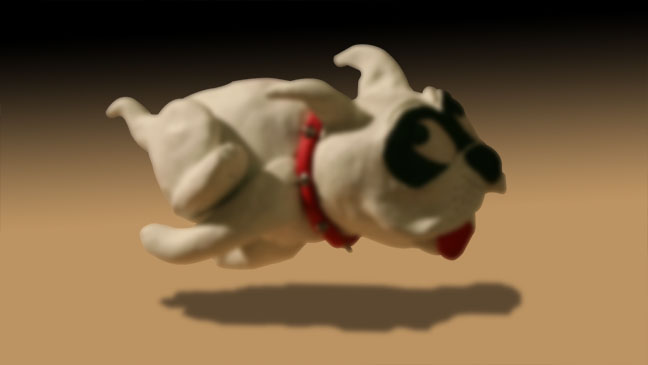
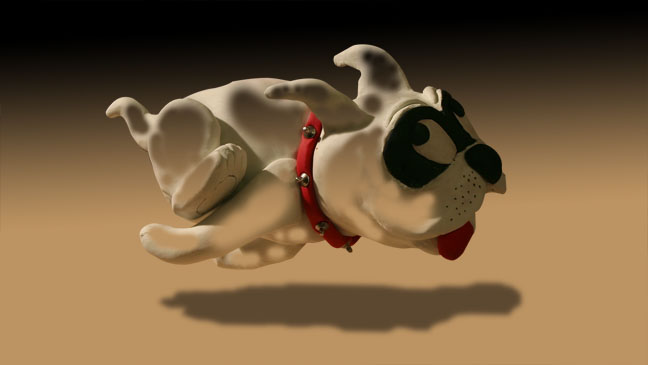
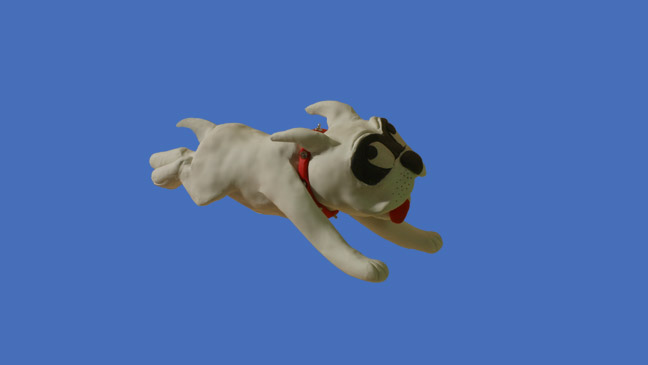
This is one of 8 different sculpts depicting Bandit in successive body positions.
Click HERE to see this sculpture move!
One of the problems common
to clay animation is fingerprints and anomalies in the clay show up from
one frame to the next. While this actually gives the model character and
makes the sculpture look interesting on any single frame, it can also create
unwanted undulation in the skin as these frames flash by at playback speed.
To minimize this problem, I've devised the following method:
In Photoshop, I create two,
identical layers; only the lower layer I rack out of focus with a blur
filter.
This smoothes out any fingerprints
and anomalies in the clay.
I then use a soft edged erase
tool and selectively erase broad areas of the skin to reveal the blurred
layer below.
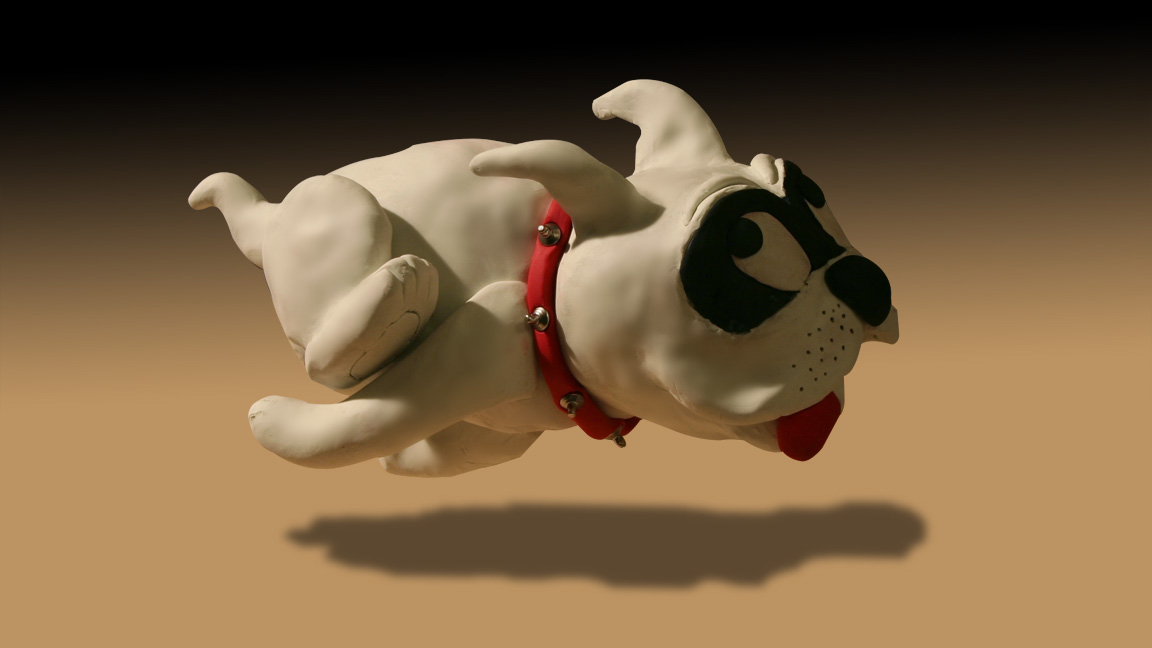
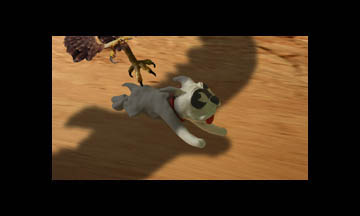
When the upper layer and lower
layer are combined, you get this!
(Click on the picture for
a larger view.)
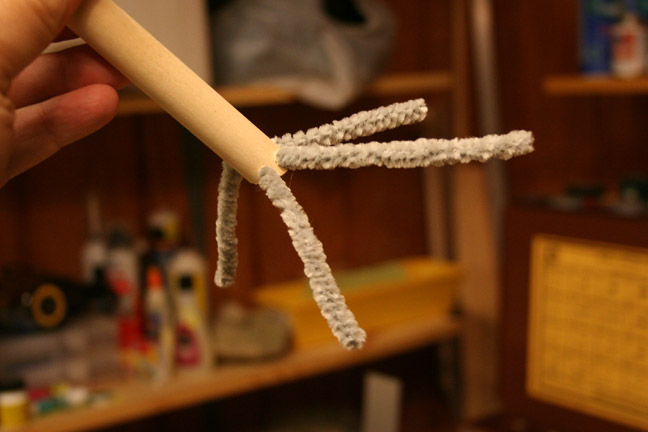
To create the Condor's foot,
I start with a wooden dowel. I insert pipe cleaners through holes drilled
in the end.
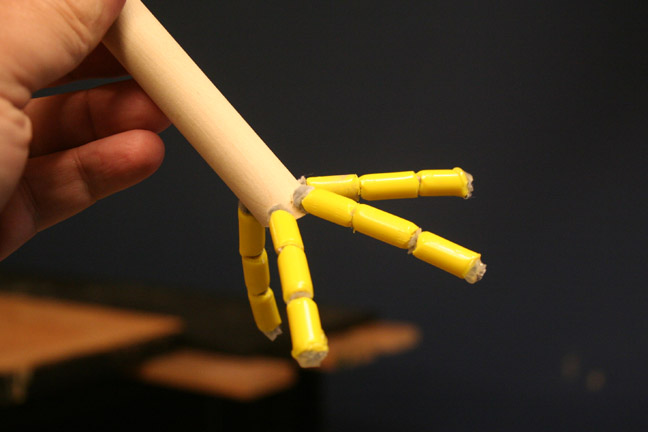
I then slide plastic tubing
segments onto the "fingers".
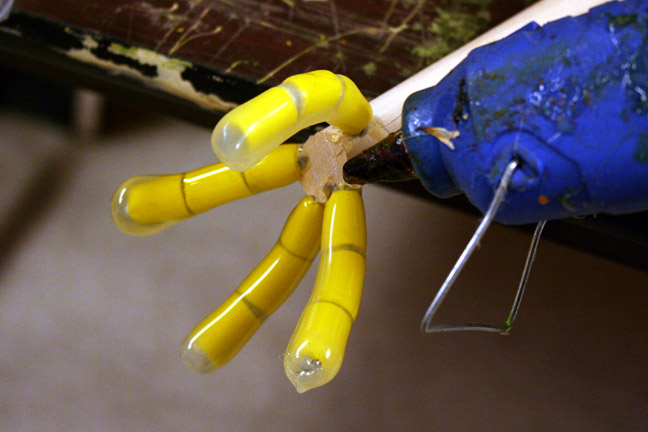
Hot melt is used to "sculpt"
the skin of the foot.
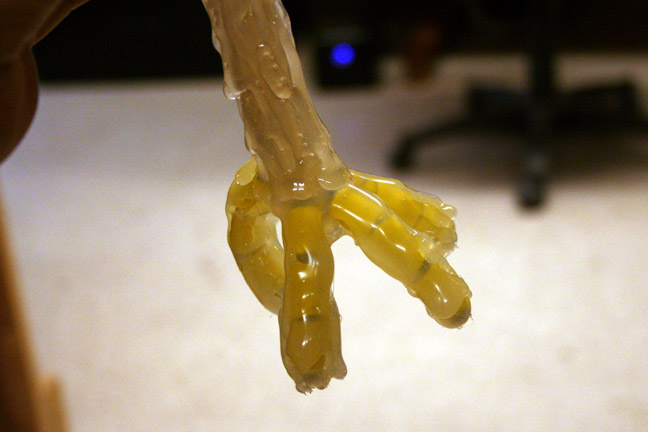
The hot-melt is layered up
and allowed to drip and sag to create interesting skin texture.
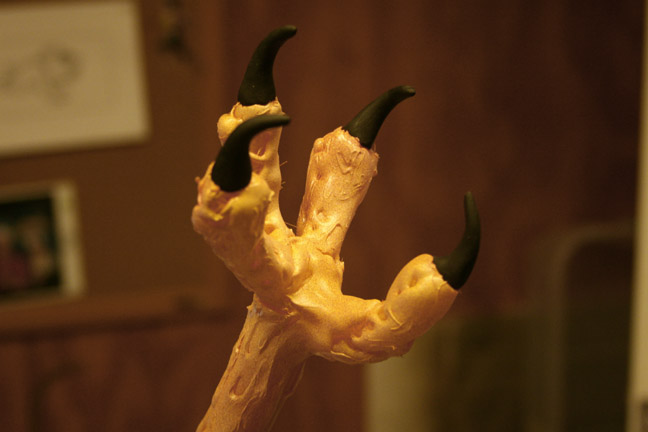
A quick coat of latex paint
and some talons made of black clay and we're done!
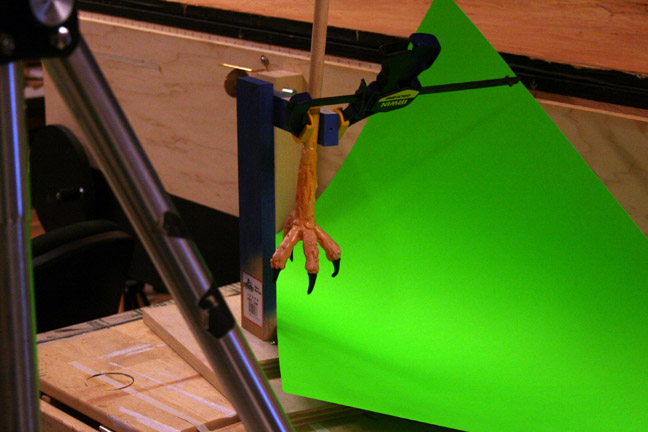
Here the foot is shot against
a piece of green poster board.
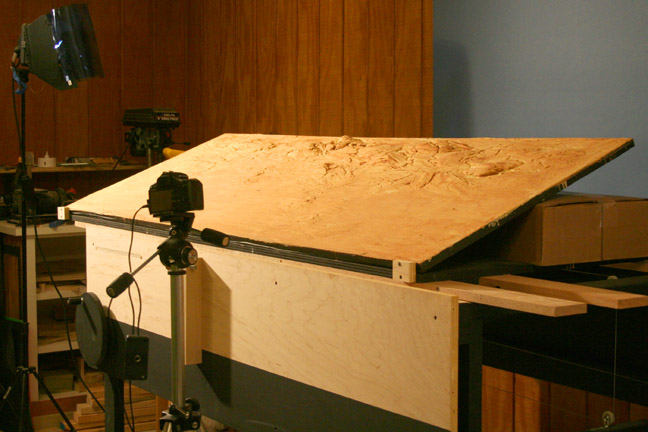
And, finally, the background must be shot. As the point of view was rather high, I just tilted the background forward and leaned it against some boxes to get the desired angle. That was easier than mounting the camera up high and looking down. The cut is 48 frames long and I wanted the background to really smoke with no strobing. So I use a slow shutter speed and moved the background by way of the crank in the bottom left hand corner. That gave the background a natural motion blur. I could have added that in Photoshop but it would be been the same across the entire frame and, in reality, portions of the stage closest to the camera will blur more than those areas further away.
Now that we have all our elements,
it's time to composite them together!
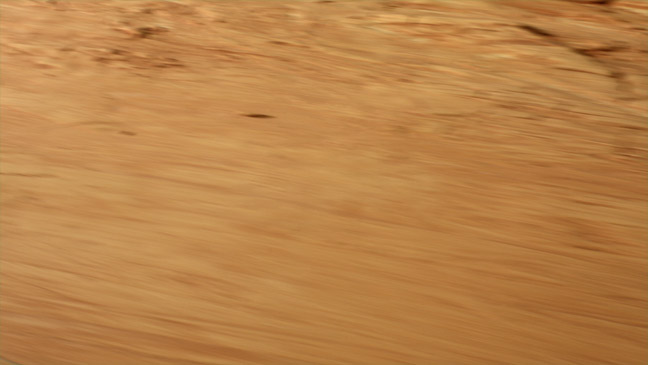
This is what the background
looks like in motion.
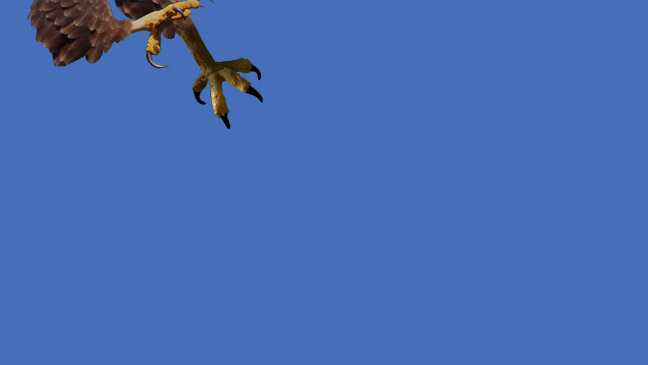
Next up is condor feet.

A shadow for both the condor
and Bandit was animated.
Because the Condor's shadow
passes over Bandit, both a dark and light version was produced. This is
the light version.
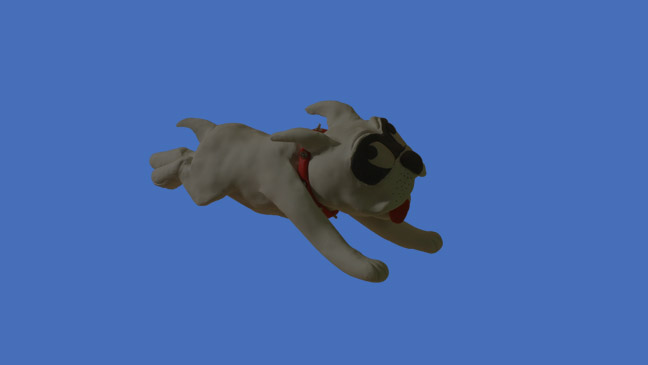
This is the darker version
of Bandit.
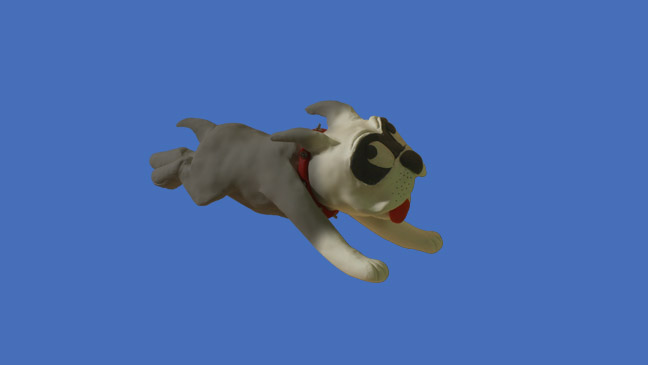
By using a soft edge wipe,
I can create the illusion of a shadow passing along his body.
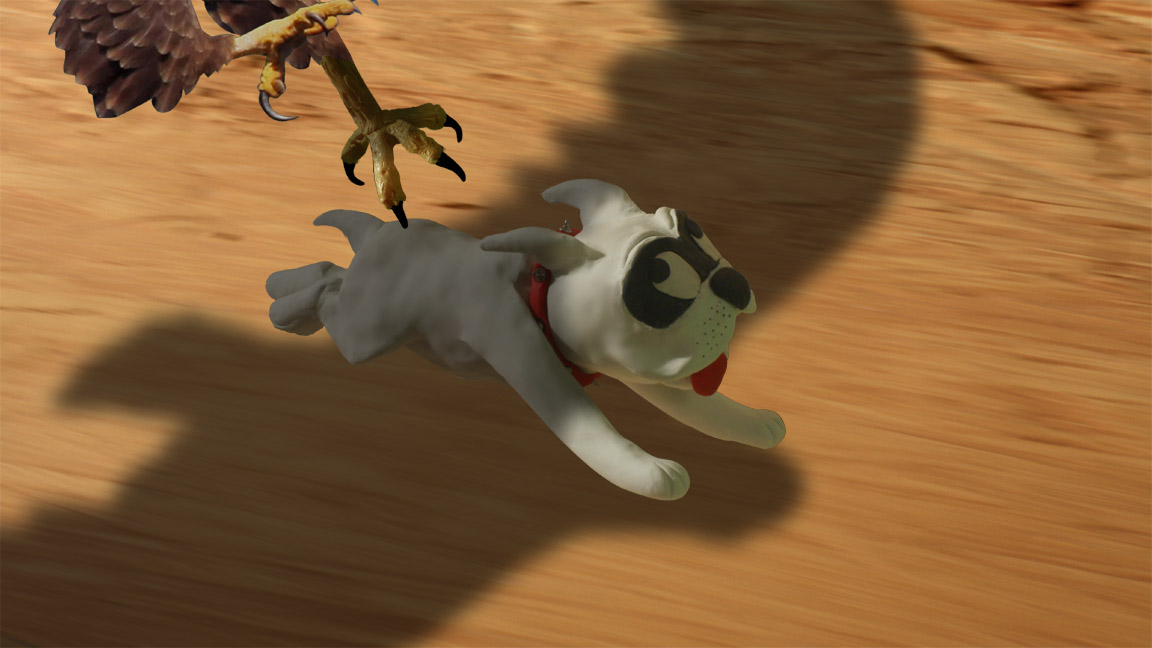
And this is what all the elements
look like together!
(Click on the picture for
a larger view.)
The final
clip is at the top of the page.
Thanks for looking!
All information, videos, photos and graphics in
this website are copyright 2009, Roger Evans. All rights reserved.
For those that enjoy the creak of leather, click
HERE
for my gallery of western art paintings