Click on a picture to see the
original version or the new version.
For more information about
how this shot was created, see below!
-UPDATE-
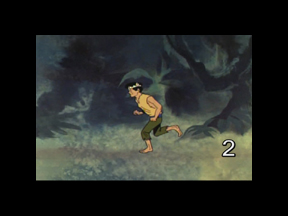
After cutting the completed version of this shot into the sequence, I felt that it didn't have the right "feeling". The guy is ostensibly being chased by something and it just seemed as if he were going for a pleasant jog in the middle of the day. So I added some graduation filters at the top and bottom and then brought the overall brightness and saturation down to give it a more foreboding look. Click on the picture above to see the new version. Click HERE to see the old version.
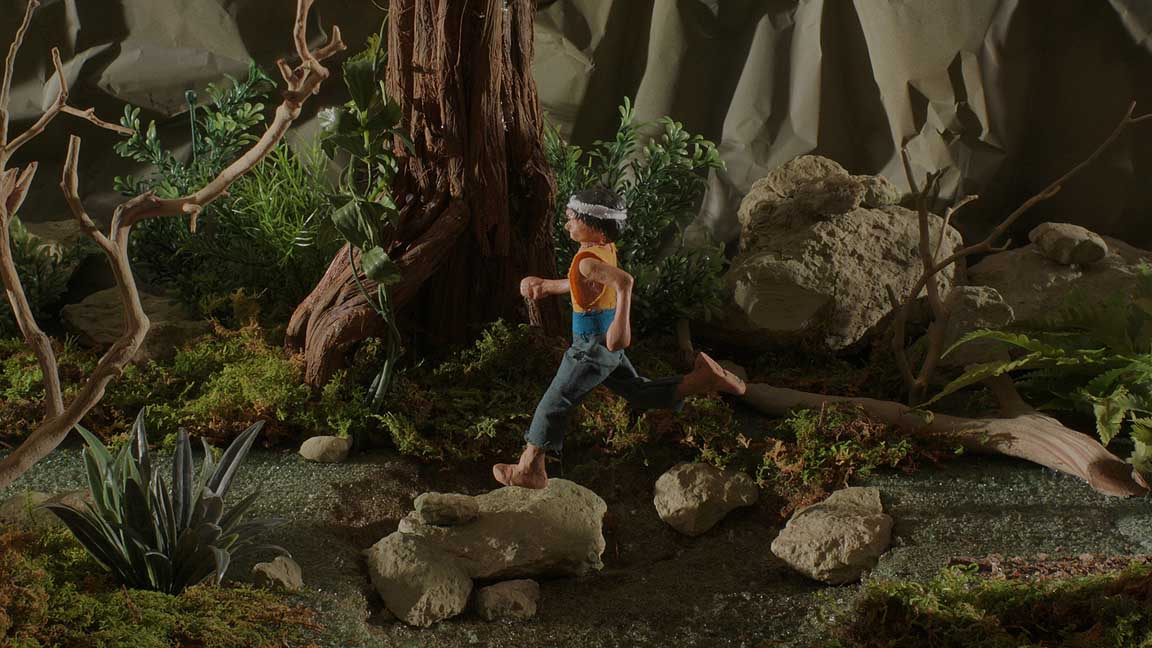
Scene 2 is about 3 seconds of a man or young boy running through the jungle (hard to tell).

Decided
to test the feasibility of using a real boy dressed appropriately and then
shooting him running using a high speed shutter to freeze the action. I
would then use the footage to create a running cycle. These individual
frames would either be used directly or as a reference to animate a puppet
scaled to the appropriate size.
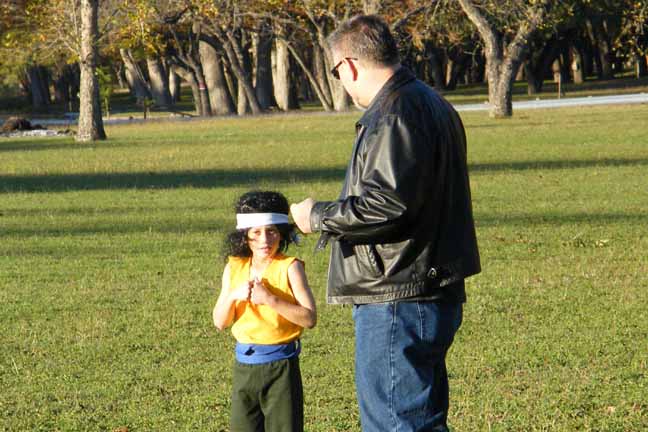
I recruited
the son of my secretary, Sugar. His name is Jaren and he was game enough
to wear a black wig and some torn clothing and run barefoot on a fairly
brisk winter day. What a trooper. We purposely exagerated the hair and
clothing in a basic attempt to make him look more "puppet-like". This was
necessary in case I decided to use the actual footage of him running. I
wanted to make sure that it mixed in with the rest of the stop motion shots.
By using a high speed shutter, his body position would be "frozen" and
exhibit no motion blur which, theoretically, should make him look more
animated and less fluid.

Here's
Jaren strutting his stuff for the camera.
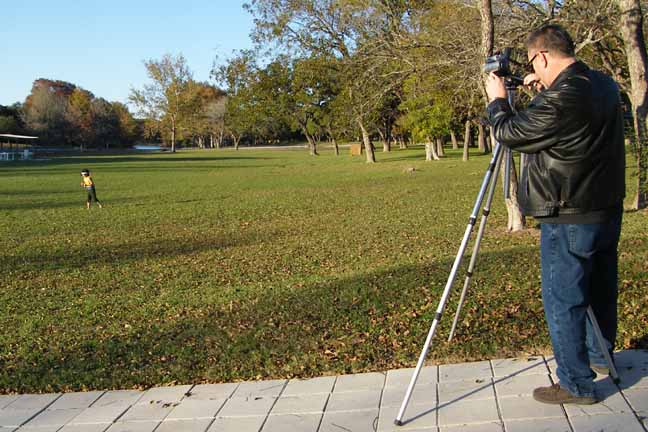
Kind
of hard to tell but I had the camer turned side ways so that I could maximize
the resolution of the image in the HD video frame. In other words, I was
shooting him running as a vertical, which meant that the captured footage
was sideways. But that was easily rotated in post for proper viewing.
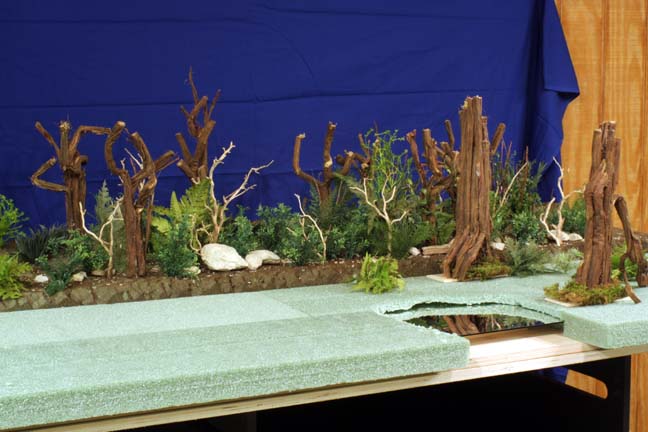
Here's
the jungle set under construction. Note the first surface mirror inserted
into the set as a pond. The set is actually in three sections. The front
two sections move independently with the foreground moving at twice the
speed of the mid ground section, while the back section does not move at
all. This will create a multiplane effect that will force the perspective
of the set while the camera appears to track with the running boy or puppet
(still haven't decided).
Two different
lighting tests. One above and one below. Both on an unfinished set.

Obviously,
the set still needs to be painted and plants added, etc. But this should
give me enough information about lighting and whether to use the photos
as replacement animation or whether to use a puppet. The jury's still out......
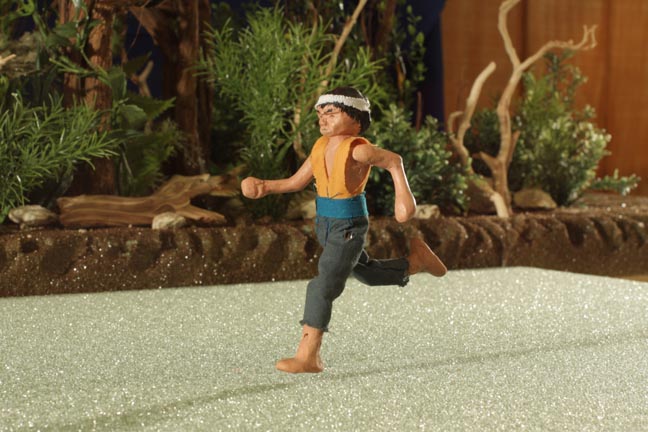
So the jury's in and I have decided to go ahead and make a puppet. The photo cut outs would work perfectly fine but I really want to have the camera rotate around the subject and the flat nature of the photo cut outs would not allow that kind of depth and movement.. Also, upon closer inspection, the guy running isn't a young boy but, rather, a small man. So I decided to whip out a puppet. Here we go!
Puppet Making 101:
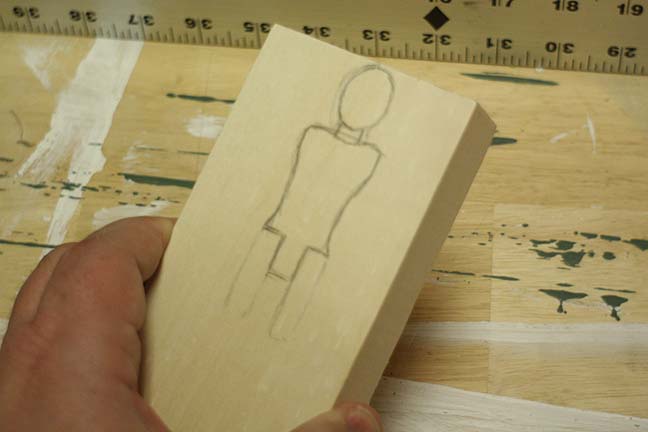
First
I roughed an outline on block of wood.
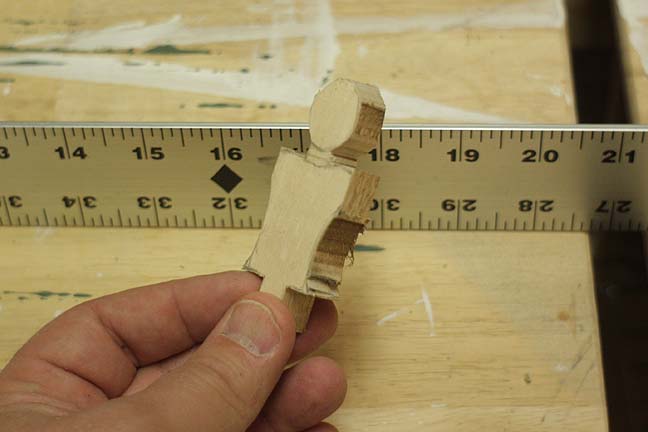
Next
the figure is cut using a band saw.
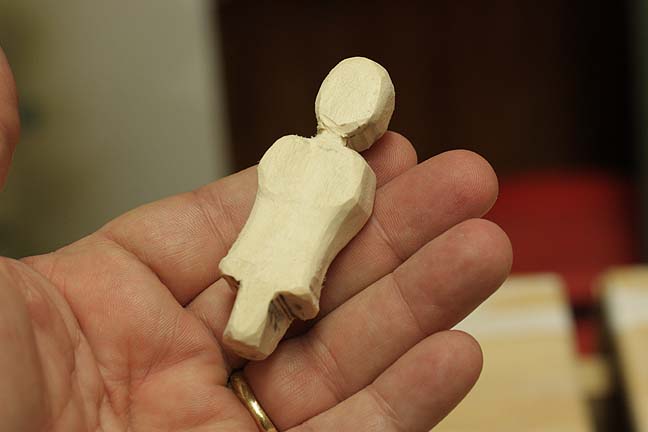
A bit
of sanding to give it some shape.
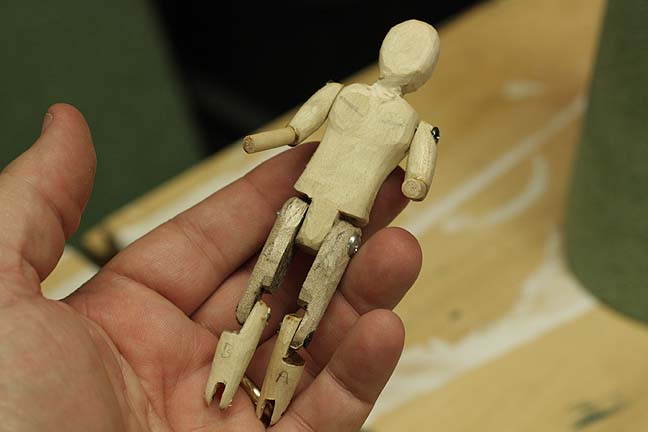
Normally,
I would make a metal ball and socket armature. However, since this puppet
is always running in a straight line, simple wooden swivels will work just
fine. Actually, swivels make animation of repetitive movements much easier
and more precise as ball and socket joints tend to "wander" and have to
constantly be kept in line, depending on the design of the armature. You
will notice that the arms have no joints at the elbow. After looking at
the reference footage, it appeared that just keeping the arms at an angle
while they swing would suffice. The head is permanently attached with no
joint, as well. This is because there is no need to turn the head and,
also, because the puppet will be supported by a bracket from above on the
far side of the head.
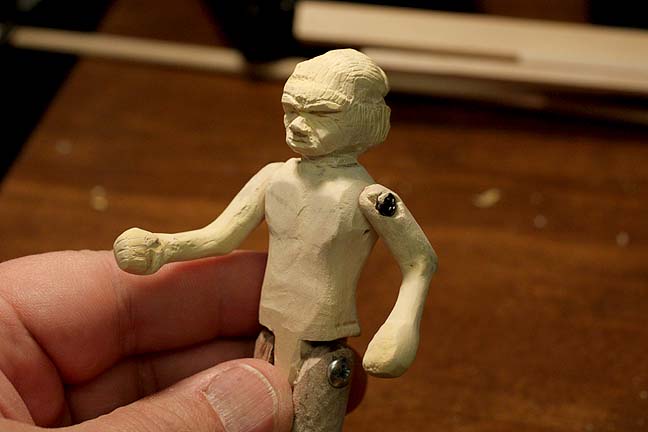
The head
was covered with wood filler and let dry and then carved. I gotta tell
you, this is a really, really tiny puppet, which makes carving and
sculpting a real pain. Since it appears the figure is a man, I decided
to make him an older man, as wrinkles and craggy features are easier to
produce in miniature than the smooth skin of a younger person. I also exagerated
his features into a more "native" look. The hair is sculpted in place
and a depression built in to accomodate the head band.
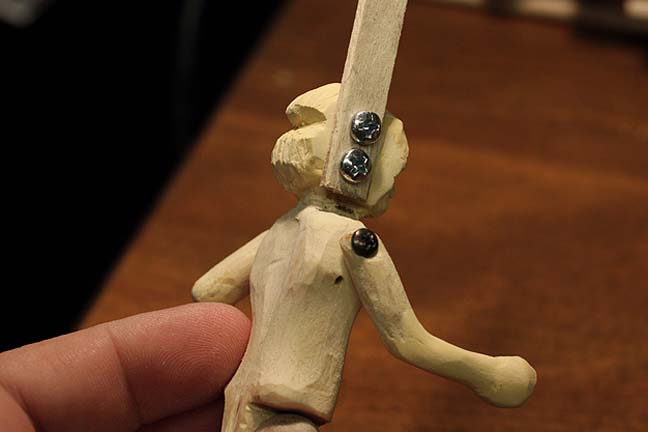
Since
the puppet is always seen from his left side, I was able to attach an overhead
support directly to his off-camera side. This support will have a positive
register that can repeatedly be removed or put back in place for each frame.
This will allow me to remove the puppet from the set, bend it into a new
position off-set by comparing it to a 1:1 frame of the running boy, then
put the puppet back in place accurately, as if it were pin registered.
However, while the puppet is absent from the set, I will shoot an additional
frame of the set "clean". This clean shot will be used to erase the overhead
support when the two shots are combined on a per frame basis in Photoshop.
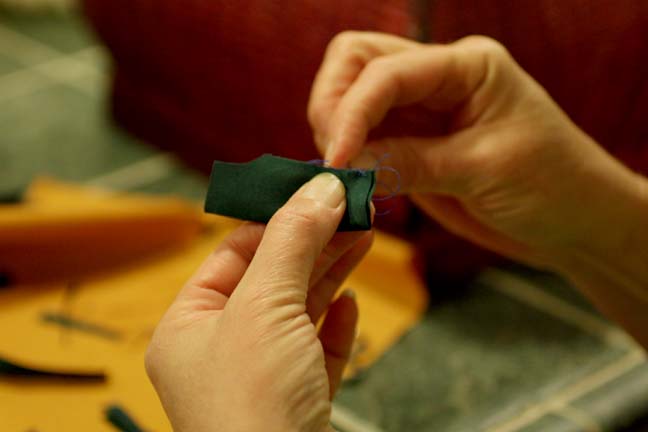
Unfortunately,
neither Brandi nor I sew worth spit, even for full size clothing. So I
needed to call in a pro. Here my wife, Annette, struggles with the tiniest
pair of britches she's ever handled (and you can read into that what you
will).
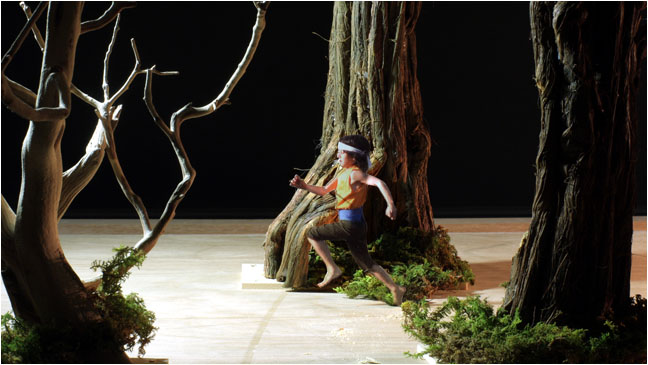
Below is another lighting test for the finished puppet.
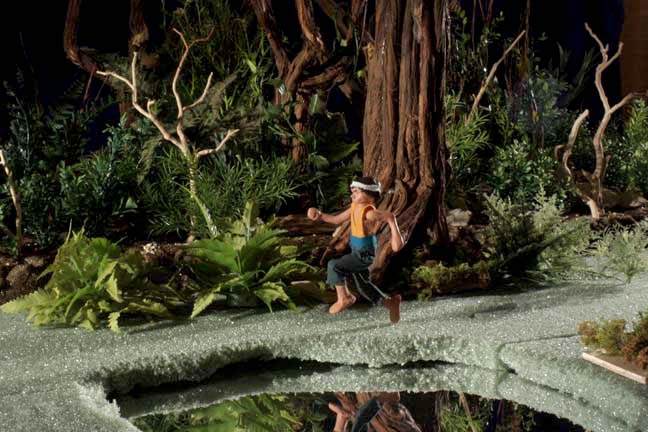
Again,
the set is not finished but this shot allows me to see what the completed
puppet will look like. In all, I like this much better than the photo cut
out, which mandated a side view. And using an overhead support instead
of traditional tie-downs allows the option of mid-air poses not usually
practical with tie downs through the toes. Though not as detailed as could
be achieved on a larger puppet, this will suffice for a wide, three second
shot of him in continuous motion. I color matched the acrylic paint on
his skin to some tan colored clay that we have in stock. That way I can
use the clay to cover the screw heads at the joints on his shoulders and
ankles. My goal is a level of realism that makes it visually interesting
while also reflecting the traditional "Hanna Barbara" look typical of the
series.
Completed
the overhead support system for the puppet.
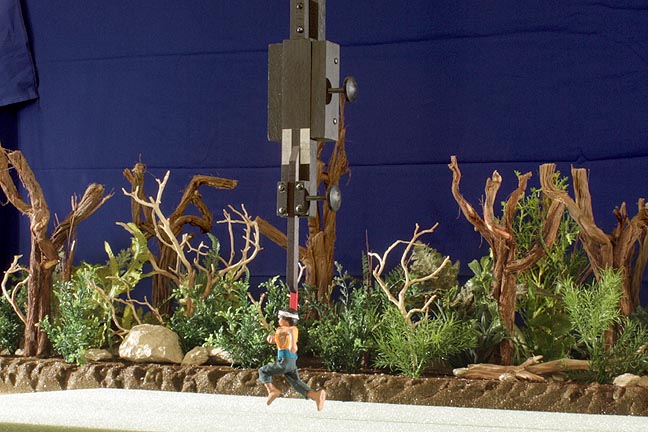
Again,
the set is not anywhere complete but I needed to get the overhead support
in place before making decisions about plant placement, running path,
etc. The top black knob is loosened so the entire lower support column
can be removed in between exposures. This is necessary for two reasons.
One is to reposition the puppet and the other is to take a second "clean"
shot of the set without the overhead support. Below is an example of how
this works.
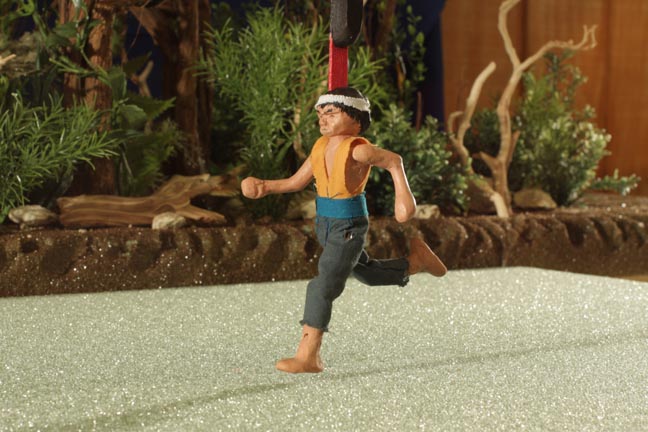
Above
you can clearly see the support bracket above the puppet. The part of the
bracket behind his head was colored bright red so that I could key that
out and not have to manually roto (cut out) around his head for every single
frame. So the red allows an automatic cut and then final cleaning is done
using the erase tool in Photoshop.
Above
is a frame where the bracket has been removed. The area directly above
the puppet's head is from a totally different frame.
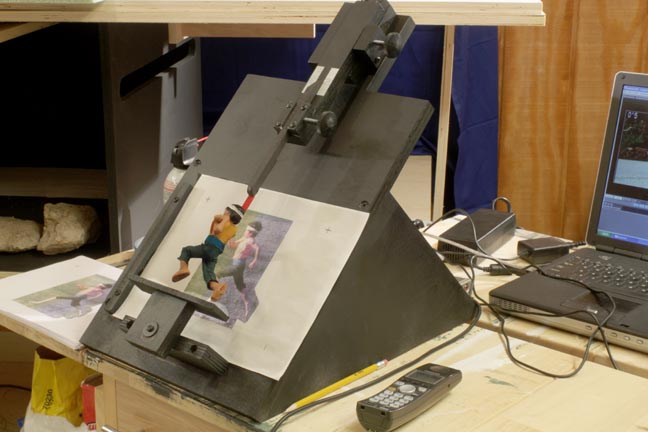
In between
each exposure, the support column (with the puppet still attached) is moved
to a positioning easel. This easel has a locking system that is identical
to the one above the set. There are a total of 15 positions taken from
the footage I shot of the boy running. These positions form the complete
running cycle that will be used for the 3 second shot. Those have been
printed out onto 8.5 x 11 sheets, each of which will "corner up" for repeatable
registration. The puppet is then bent into a position to match the photo
on the paper.

The support
column has a separate, smaller column that can be moved up and down independently
of the larger support column. There is a numbered vertical scale that tells
me what height to move the smaller column to raise the puppet up and down
for each frame. This is necessary since his running makes him move up and
down during the shot. Though this all sounds complicated, it really isn't.
I just move the set to its new position (since the background is moving),
put the column in place, take a frame, then loosen the top knob, remove
the column, take a "clean" shot, put the column on the easel, reposition
him based on the photo, then put the column back on the set.
I then
repeat this about 70 times for the entire clip! :)
I did a sample running cycle, just to test the whole concept. The background isn't moving, so the puppet appears to "moonwalk" but it shows that the system works.
Click
HERE
to see the run cycle test!
(no
audio).
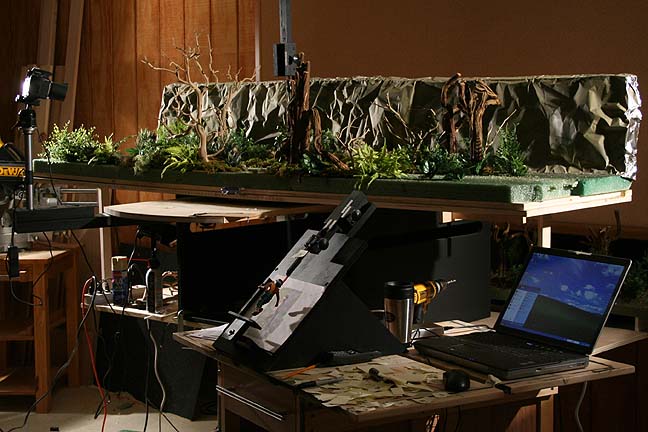
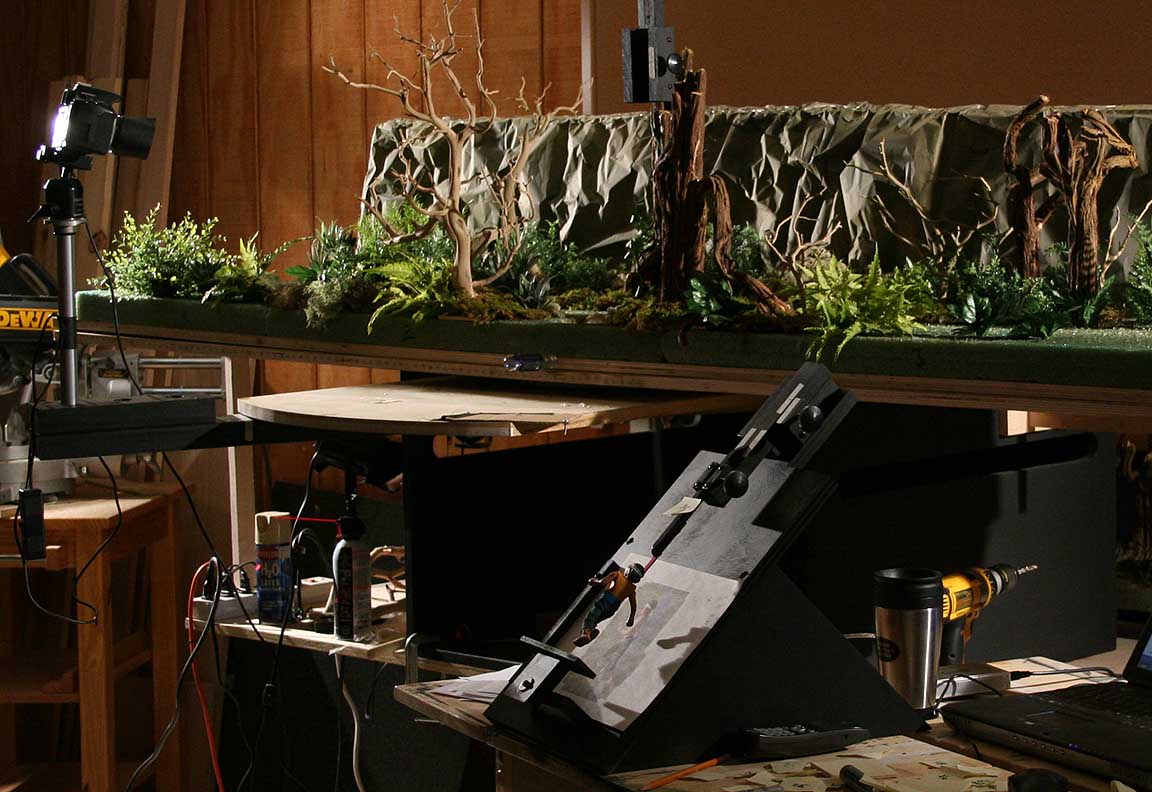
Big day!
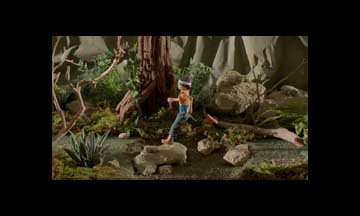
Completed the jungle-run set and made ready to shoot.
(For
a larger view of this photo, click HERE.)
The whole
set is about 8 feet in length and slides side to side in increments. Oddly
enough, this is just low-tech wood on wood. My wife, Annette, had the brilliant
idea to coat the platform with Johnson's Paste Wax. Incredible. You can
slide this huge, heavy piece of wood side to side with one hand effortlessly.
I may never machine another motion control track again. In the foreground
you can see the positioning easel with the puppet in place. The rocky background
is just foil painted gray/green.
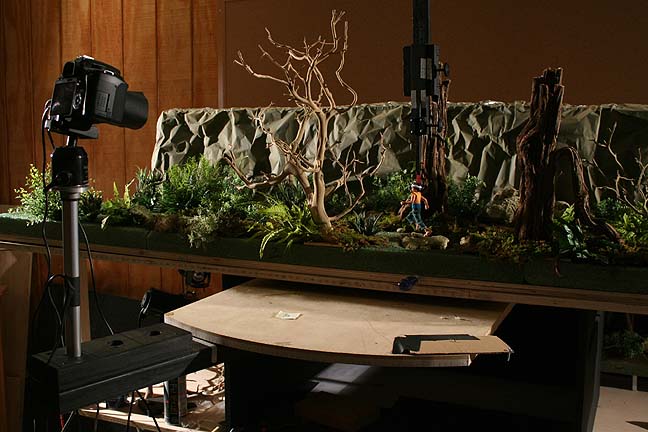
(For
a larger view of this photo, click HERE.)
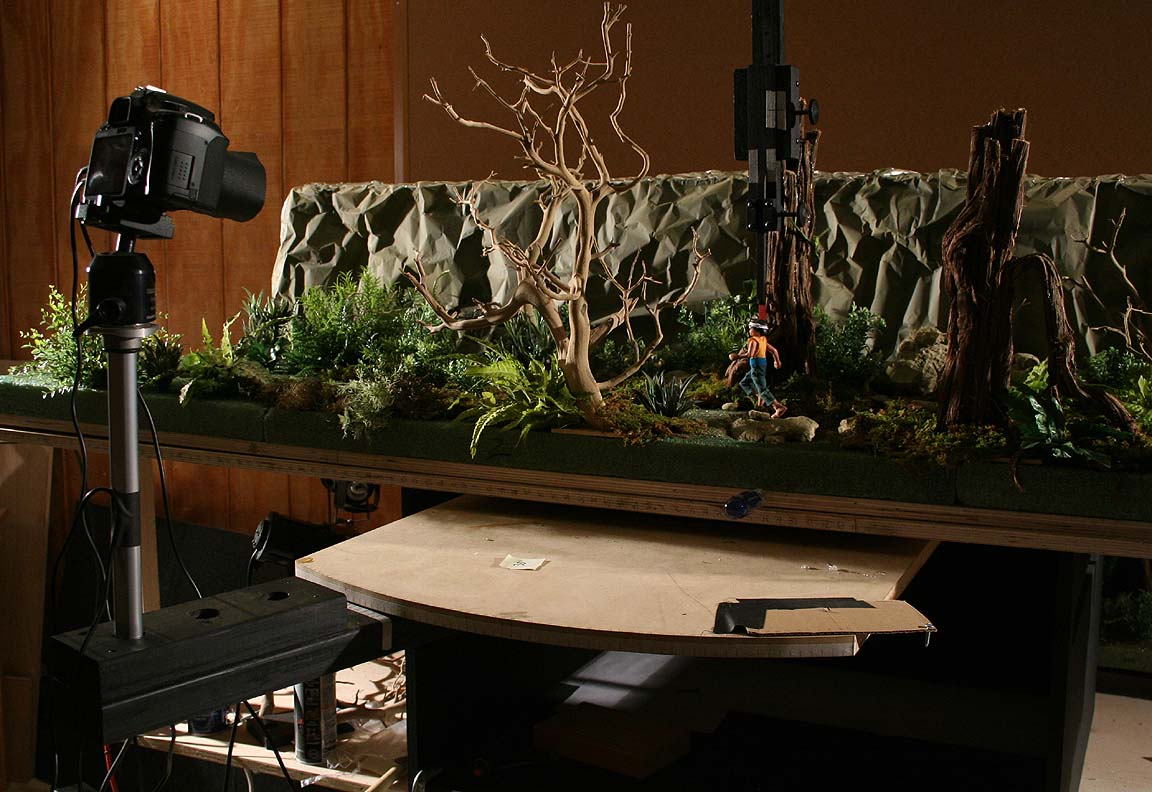
Here you can see the camera swing arm. The pivot point of the swing arm is directly underneath the puppet. So as the set is advanced side to side in increments, the camera swings in increments around the puppet. Interestingly, because all the increments are numbered and, because I knew the numerical sequence of the running cycle, I could predict where the set and camera would be for any given puppet position. This saved a tremendous amount of time because I could pose the puppet in position #1 just one time only and then slide the camera and set to the position that would correspond to that pose, take a frame, then advance the set and camera on down the line to the next set/camera position that would feature puppet pose #1, take a frame, etc. Then I would position the puppet in pose #2 and repeat through all 15 poses. Though the final animation has 84 frames with the puppet repeating its run cycle about 5 and a half times, I only had to animate the puppet one time! :)
Of course,
since I was shooting the animation out of sequence, I made sure that I
put a sticky note on the overhead rig for each shot with a number so I
could put the individual frames back in order. Otherwise, it would have
been a nightmare. The upside in doing it this way was that it saved time
and wear and tear on the puppet joints. It also reduced the likelihood
of errors. The downside is that I could not use my animation preview program
to play back the footage as I shot. So I just had to forge ahead and see
if it all worked after I was finished a few hours later.
Because
the scene goes by so fast, I decided to post a larger image so those interested
can see the set detail.
Click
on the picture for a larger view.
Thanks for looking!
All information, videos, photos and graphics in
this website are copyright 2009, Roger Evans. All rights reserved.
For those that enjoy the creak of leather, click
HERE
for my gallery of western art paintings